Yesterday the temps started breaking the freezing mark, so it’s time for me to work on the animals and hides I’ve accumulated over the winter. They’ll thaw and I’ll lose them if I don’t act.
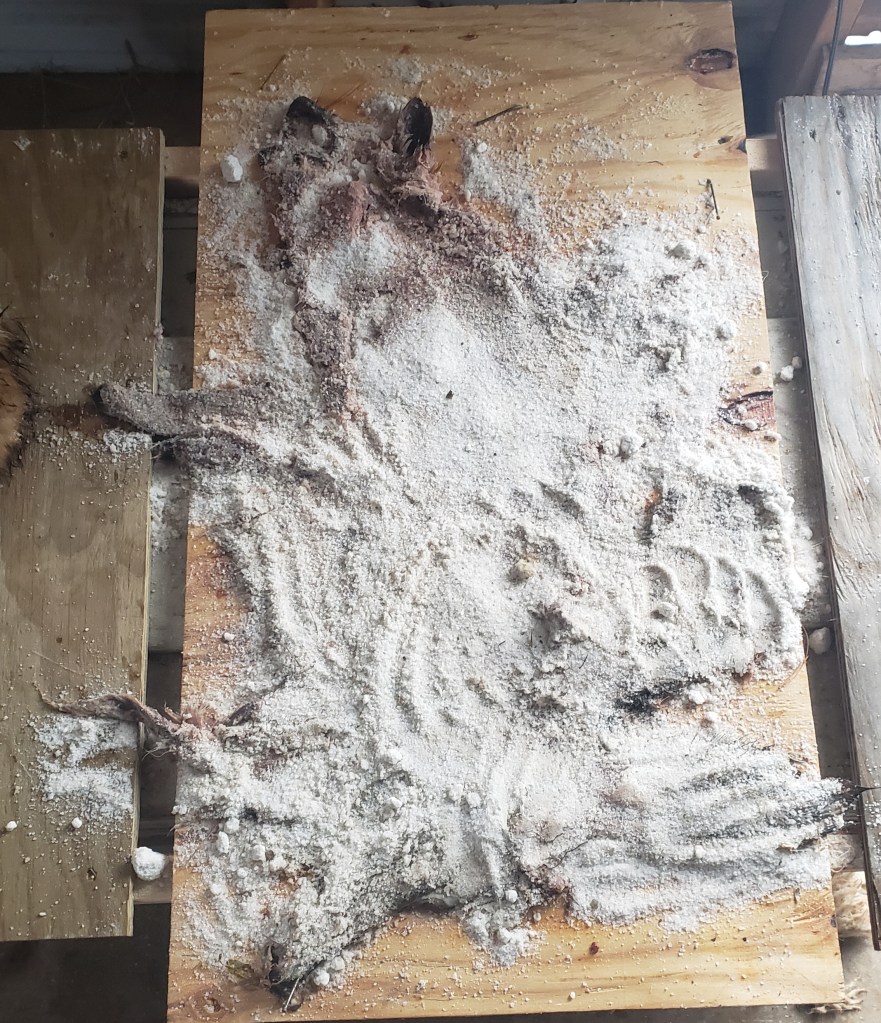
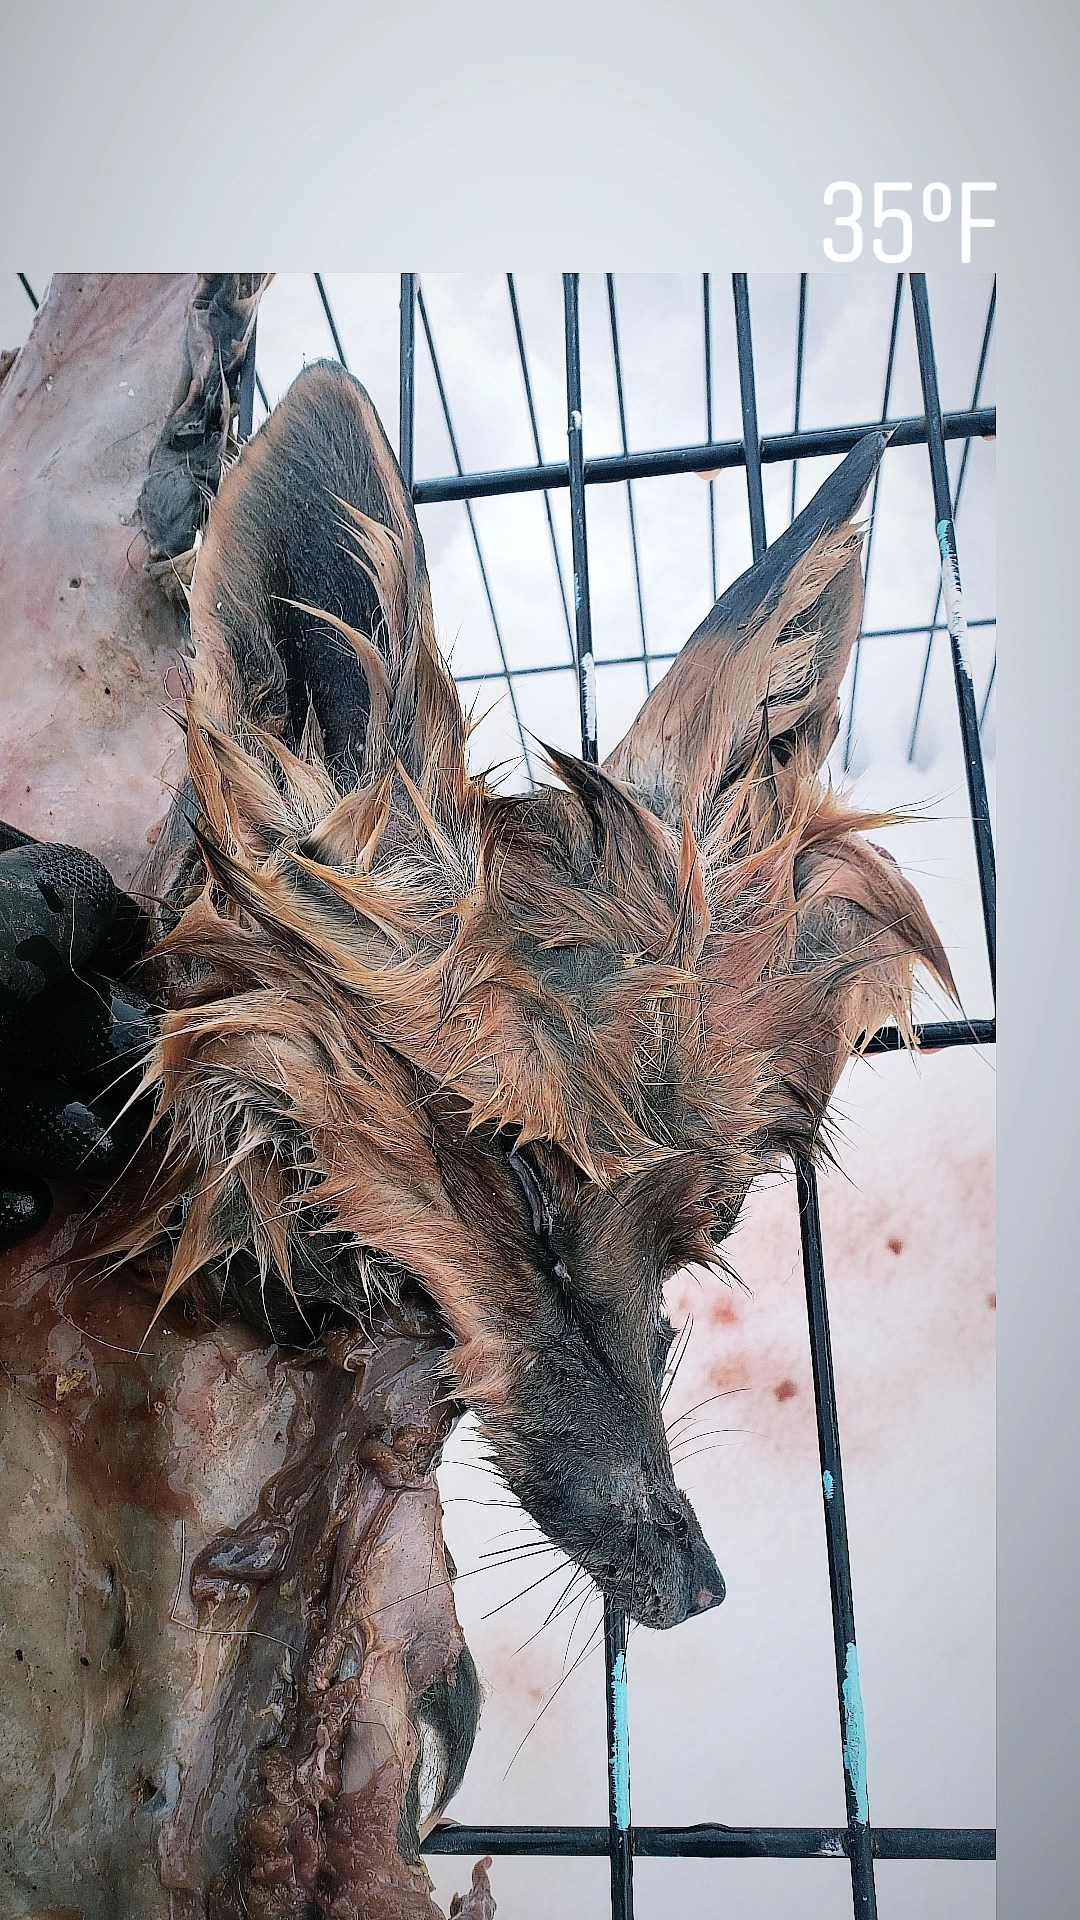
The roadkill fox was still frozen stiff, so I soaked him in a bucket of salt water until he was pliable. I then removed his broken bones, four feet, and what was left of his digestive tract after the eagle was on him in the road. His organs had all been eaten and most of his ribs taken as well as his vertebrae. His skull, which was very tricky to pull out of his mask, was crushed and broken in two. I had to be careful of sharp broken bones piercing my gloves.
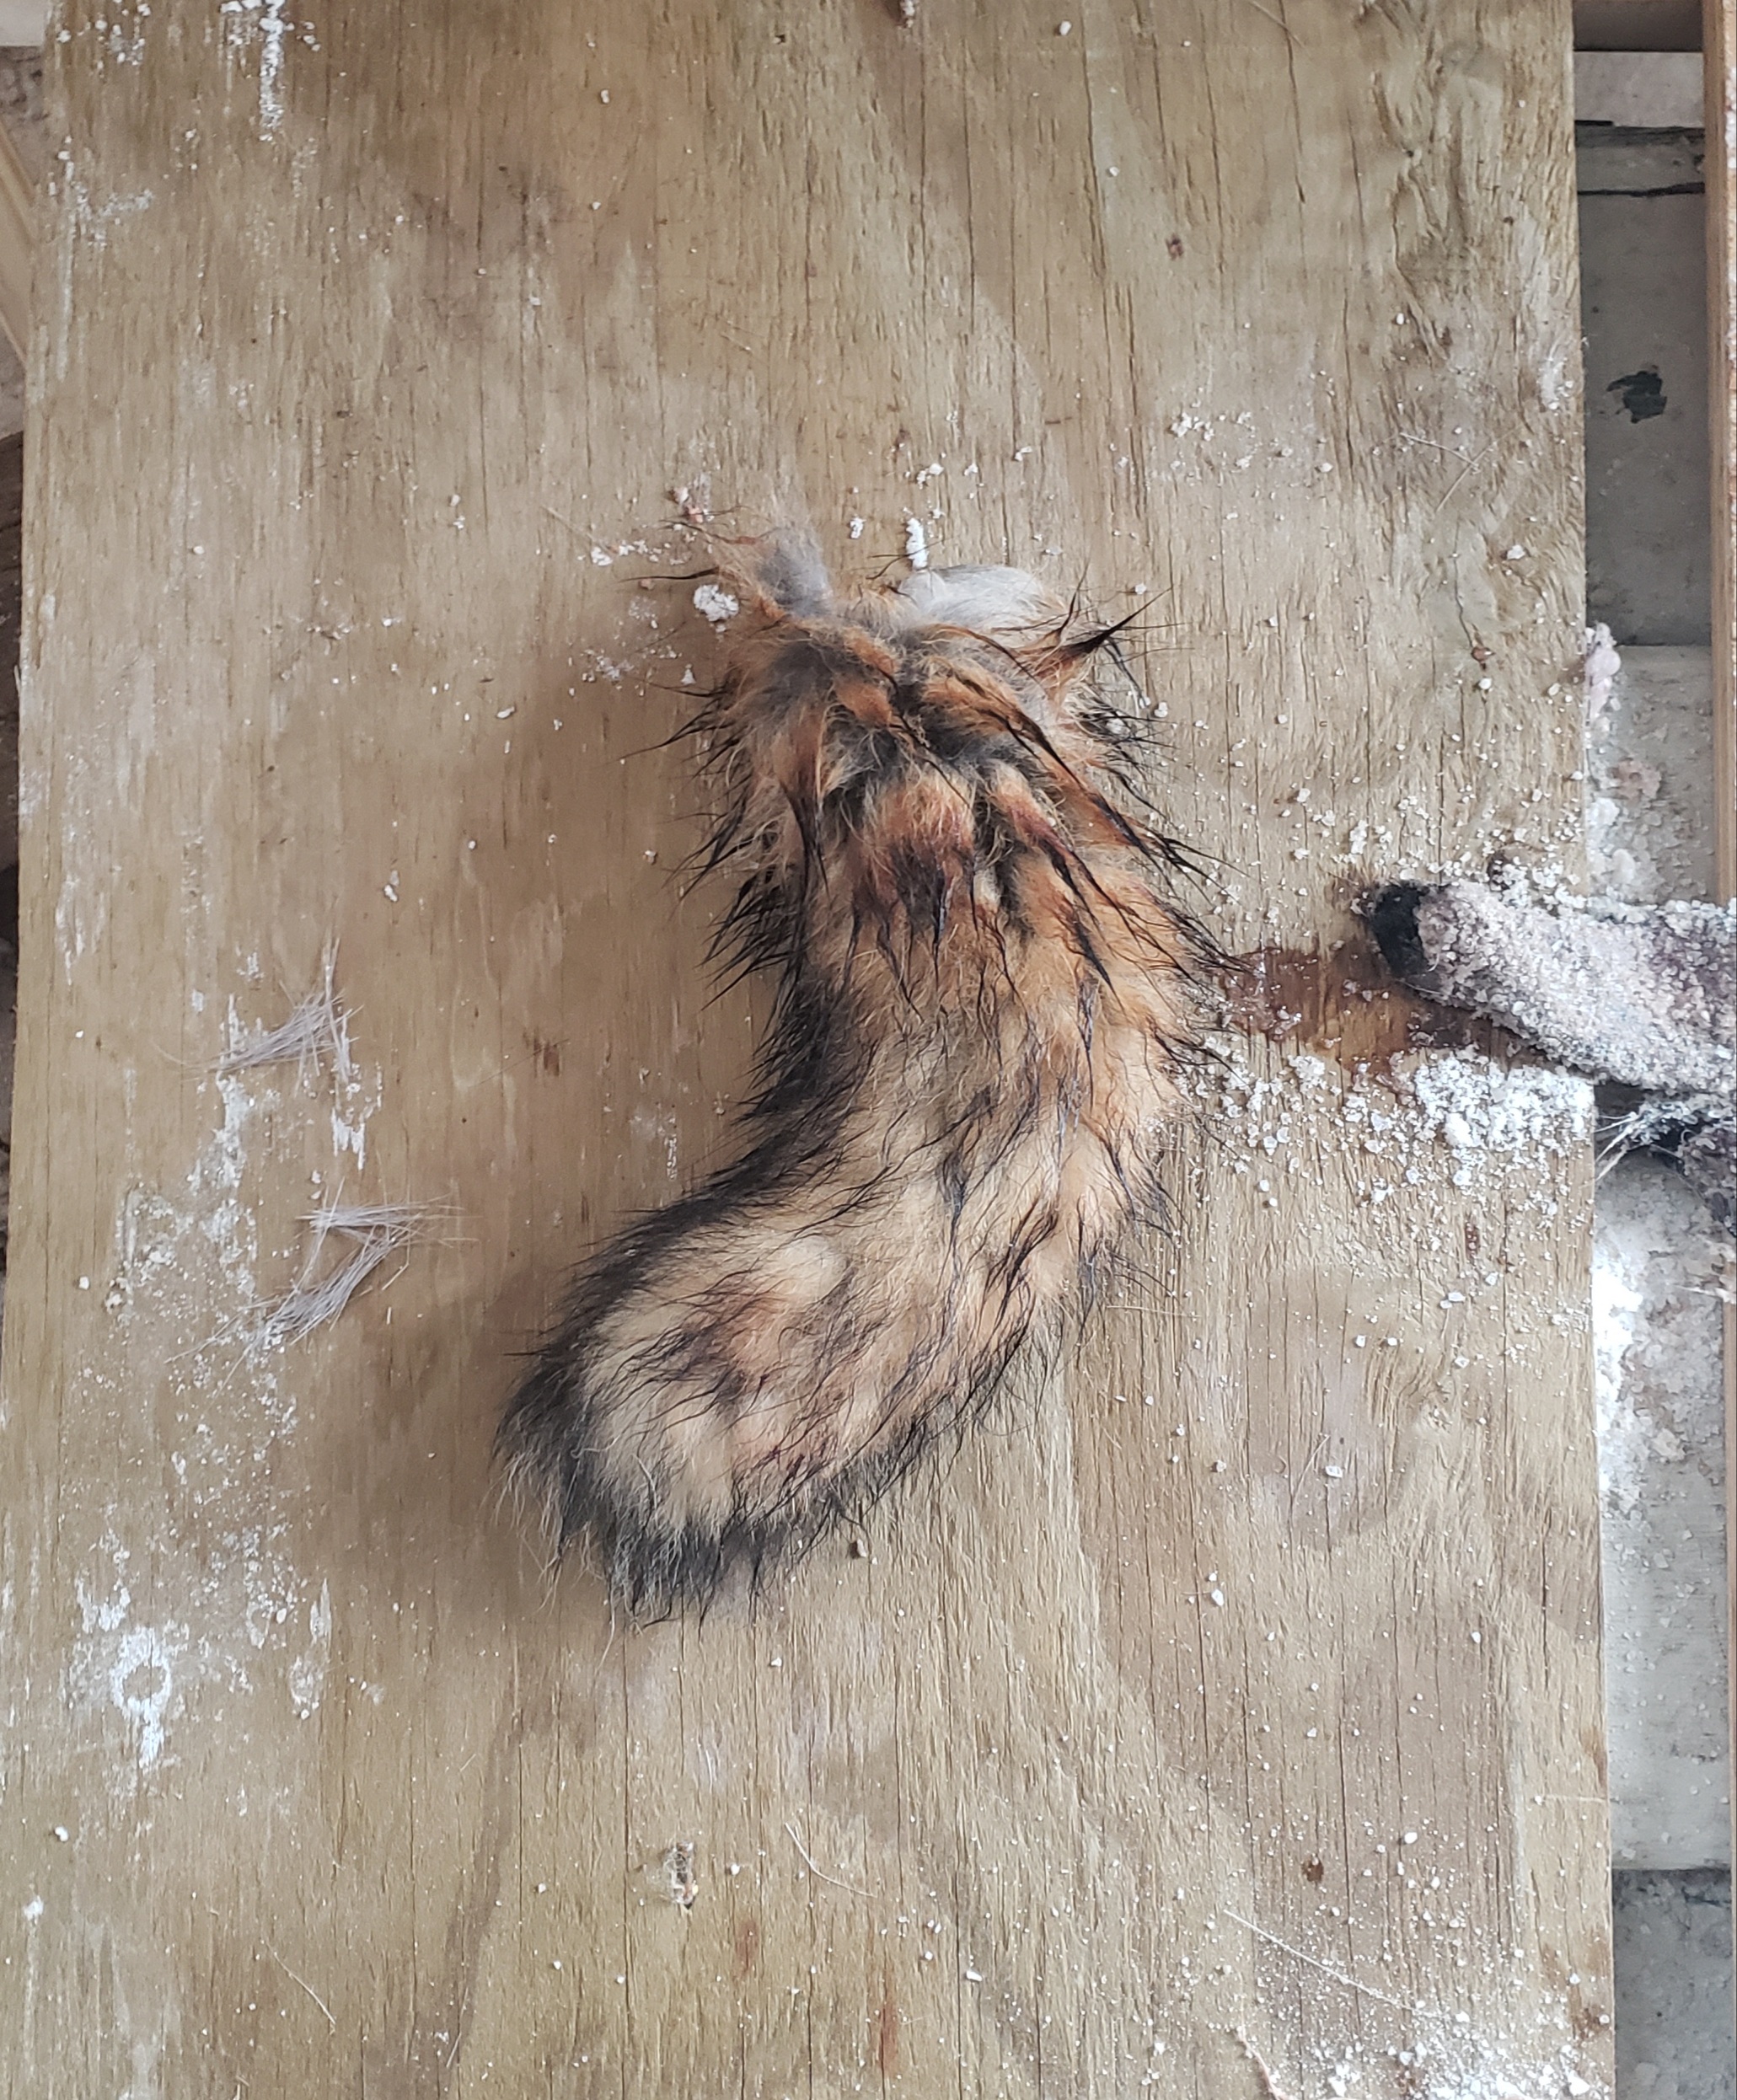
Eventually I got his legs, bones, skull, and tail removed from the hide. Unfortunately, the tail ripped off while I was fleshing it. It was a little damaged, and I got cocky using a buck knife because I couldn’t find my tail stripper. Rookie mistake and very disappointing; I’ll sew the tail back on after tanning.
I did manage to remove his whole mask (face) in one nice piece, including ears and nose.
I rinsed him a few more times in salt water, hung him briefly to drip dry, and got him under a thick layer of salt. I used more salt than usual because I haven’t fully fleshed him. I’ll do so after he’s salt cured.
Also awaiting my attention are:
A skunk (shot)
A roadkill squirrel
An entire roadkill deer
Five chickens killed by skunks and raccoons this winter
What an actual joy to create this with my guy, my bff & husband.
David and I have had this in the works for about a month now. Amazing to get anything done with an almost-6- month-old, while he works full time, I run a business part-time and also tan hides, and we somehow both also manage to keep our house habitable, etc.
If you’ve got a couple successful seasons of fat and smoke tanning behind you, this little book probably isn’t for you. But if you’re a new beginner, just getting started with tanning, done some hides but want to do better, or just curious, you might get a lot out of it and love it, too.
It lost a bit of hair to slip, but it’s mainly undercoat and not visible from the front unless you’re looking closely in the right place.
I gave it a brushing today so I could assess the “damage”, but really, it’s going to be just fine.
So there’s my reminder that alum is it!
I’ll be tawing my other 2 deer skins after I get this one and the sheep smoked.
After that, I may put my little tannery to rest for the winter. These very cold months aren’t the best for tanning, and this issue with the deer reminded me of that. This work is seasonal and I need to respect that. Especially without having my woodstove hooked up in the workshop.
I have a small (grateful it’s getting smaller) inventory of tanned skins for sale, and I’ll pick up with my 2 deer, and the last 2 sheep from ’19 when the weather starts breaking in (let’s face it) April.
Even with the excess shedding, this hide is so pretty.
My soap tanning dressing did get a bit stiff on the hides last night – it went down to 10. The deerskin looked fine and I’ll leave it another night before I scrape again and start breaking.
The sheepskin, which was dressed after the solution had cooled considerably, was a bit stiffer and some of the dressing looked frozen.
It was just barely stuck together when I unfolded it, but since it shouldn’t be stuck at all I decided to scrape and redress it.
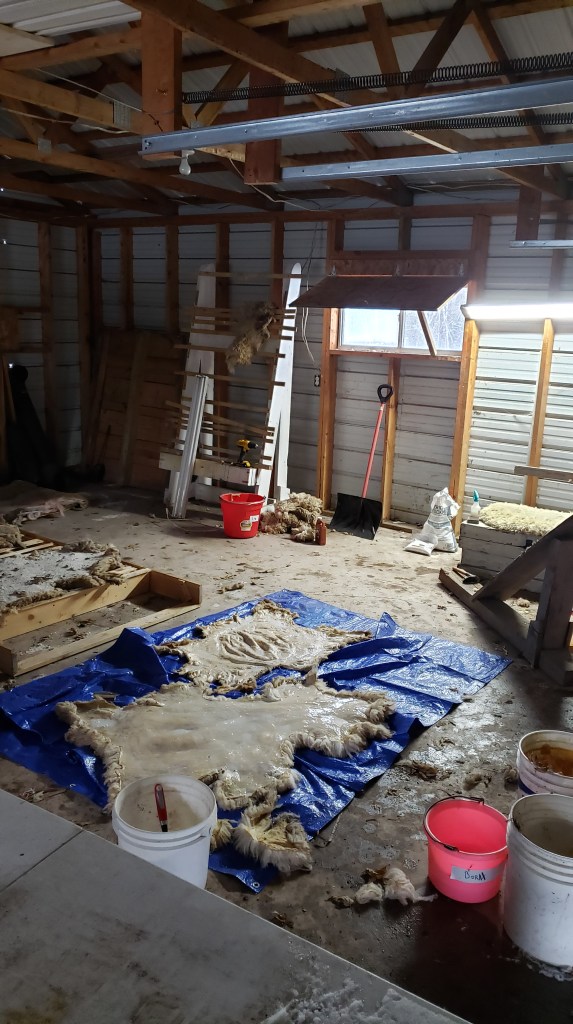
You guys. It’s cold. But. I did hide work for a couple hours after dark today.
This bad boy, who is definitely getting split into 2 pelts after smoking, finally doesn’t have wet wool anymore.
I was getting a little worried about this one because the skin side felt a bit strange – like a little extra greasy from the tanning dressing maybe. I worried it wouldn’t soften or the leather dry correctly. But it’s acting just as I expect it to.
That’s just from hand stretching. Pulling on it, basically. Where it’s white, it’s done. Where it’s yellow- brown, it needs to be broken and softened. I used my hands and my ulu to work it tonight.
You can see the difference that softening makes. It really transforms it.
This sheepskin isn’t even dry in the leather yet, so I’ve got much more stretching and breaking to do. I’ll need to keep doing it – softening with hand and tool – until the leather is totally dry. Then it will (finally) be ready for smoking.
Final result for today
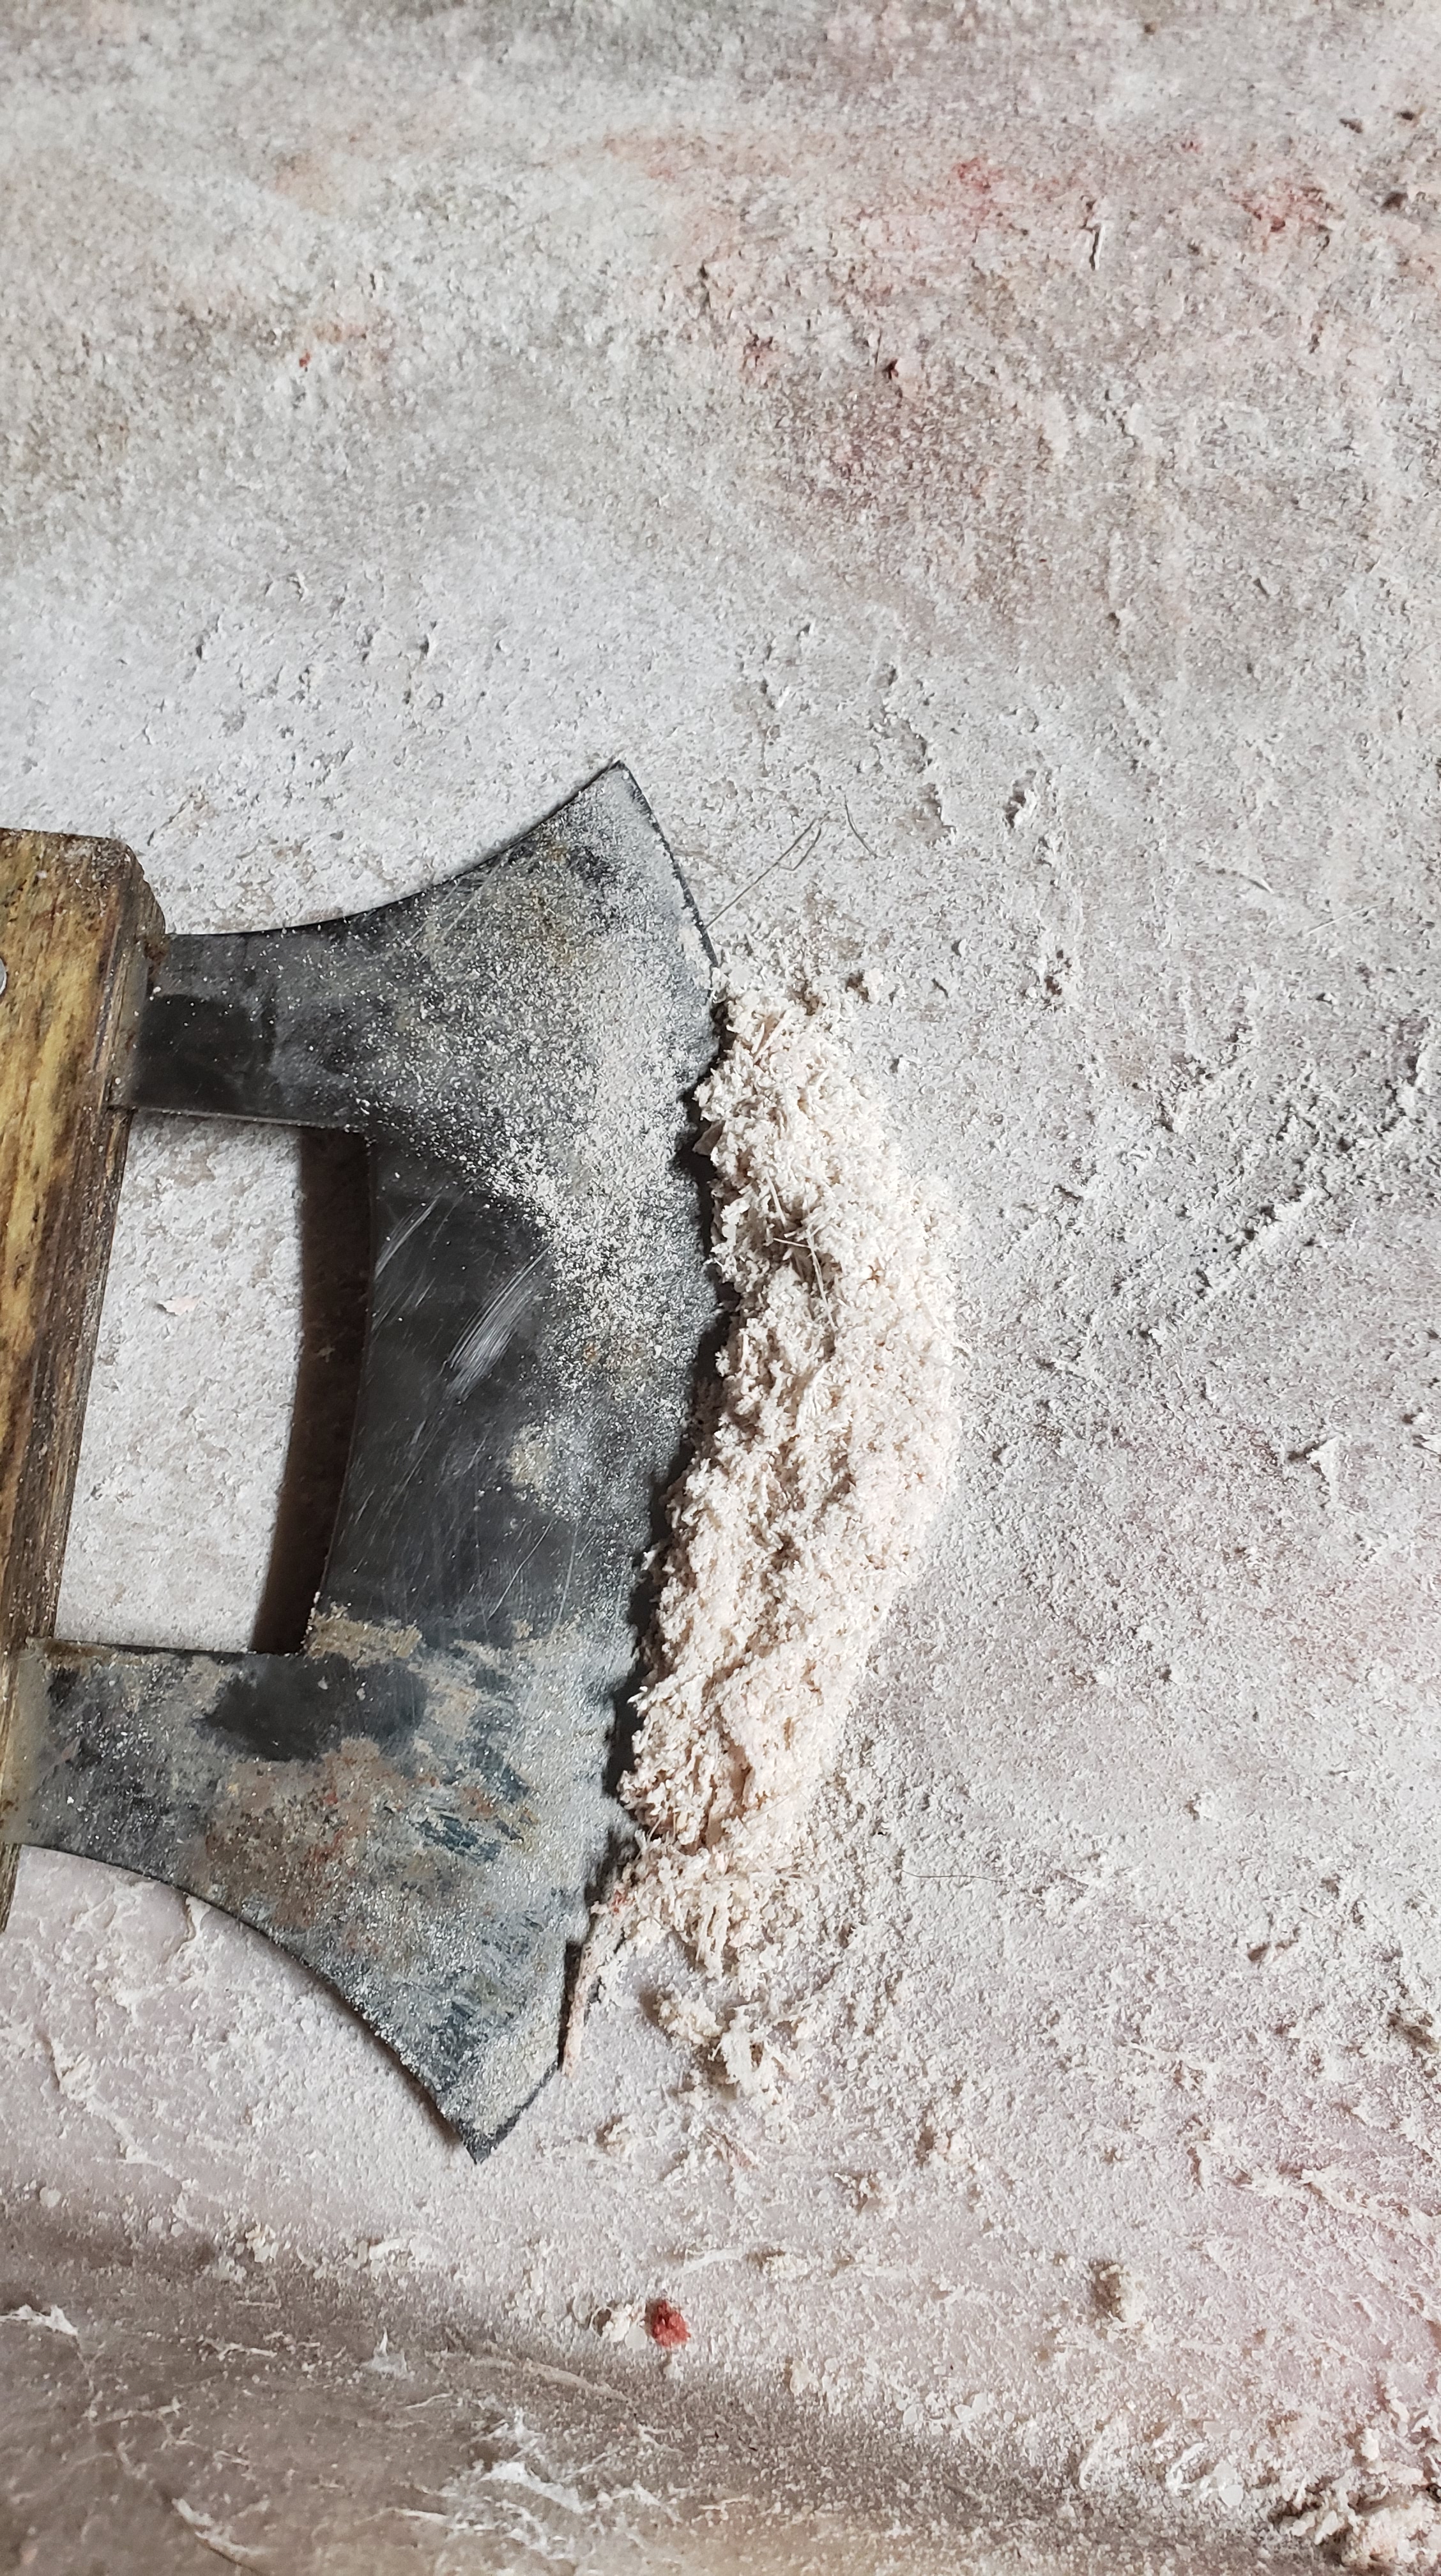
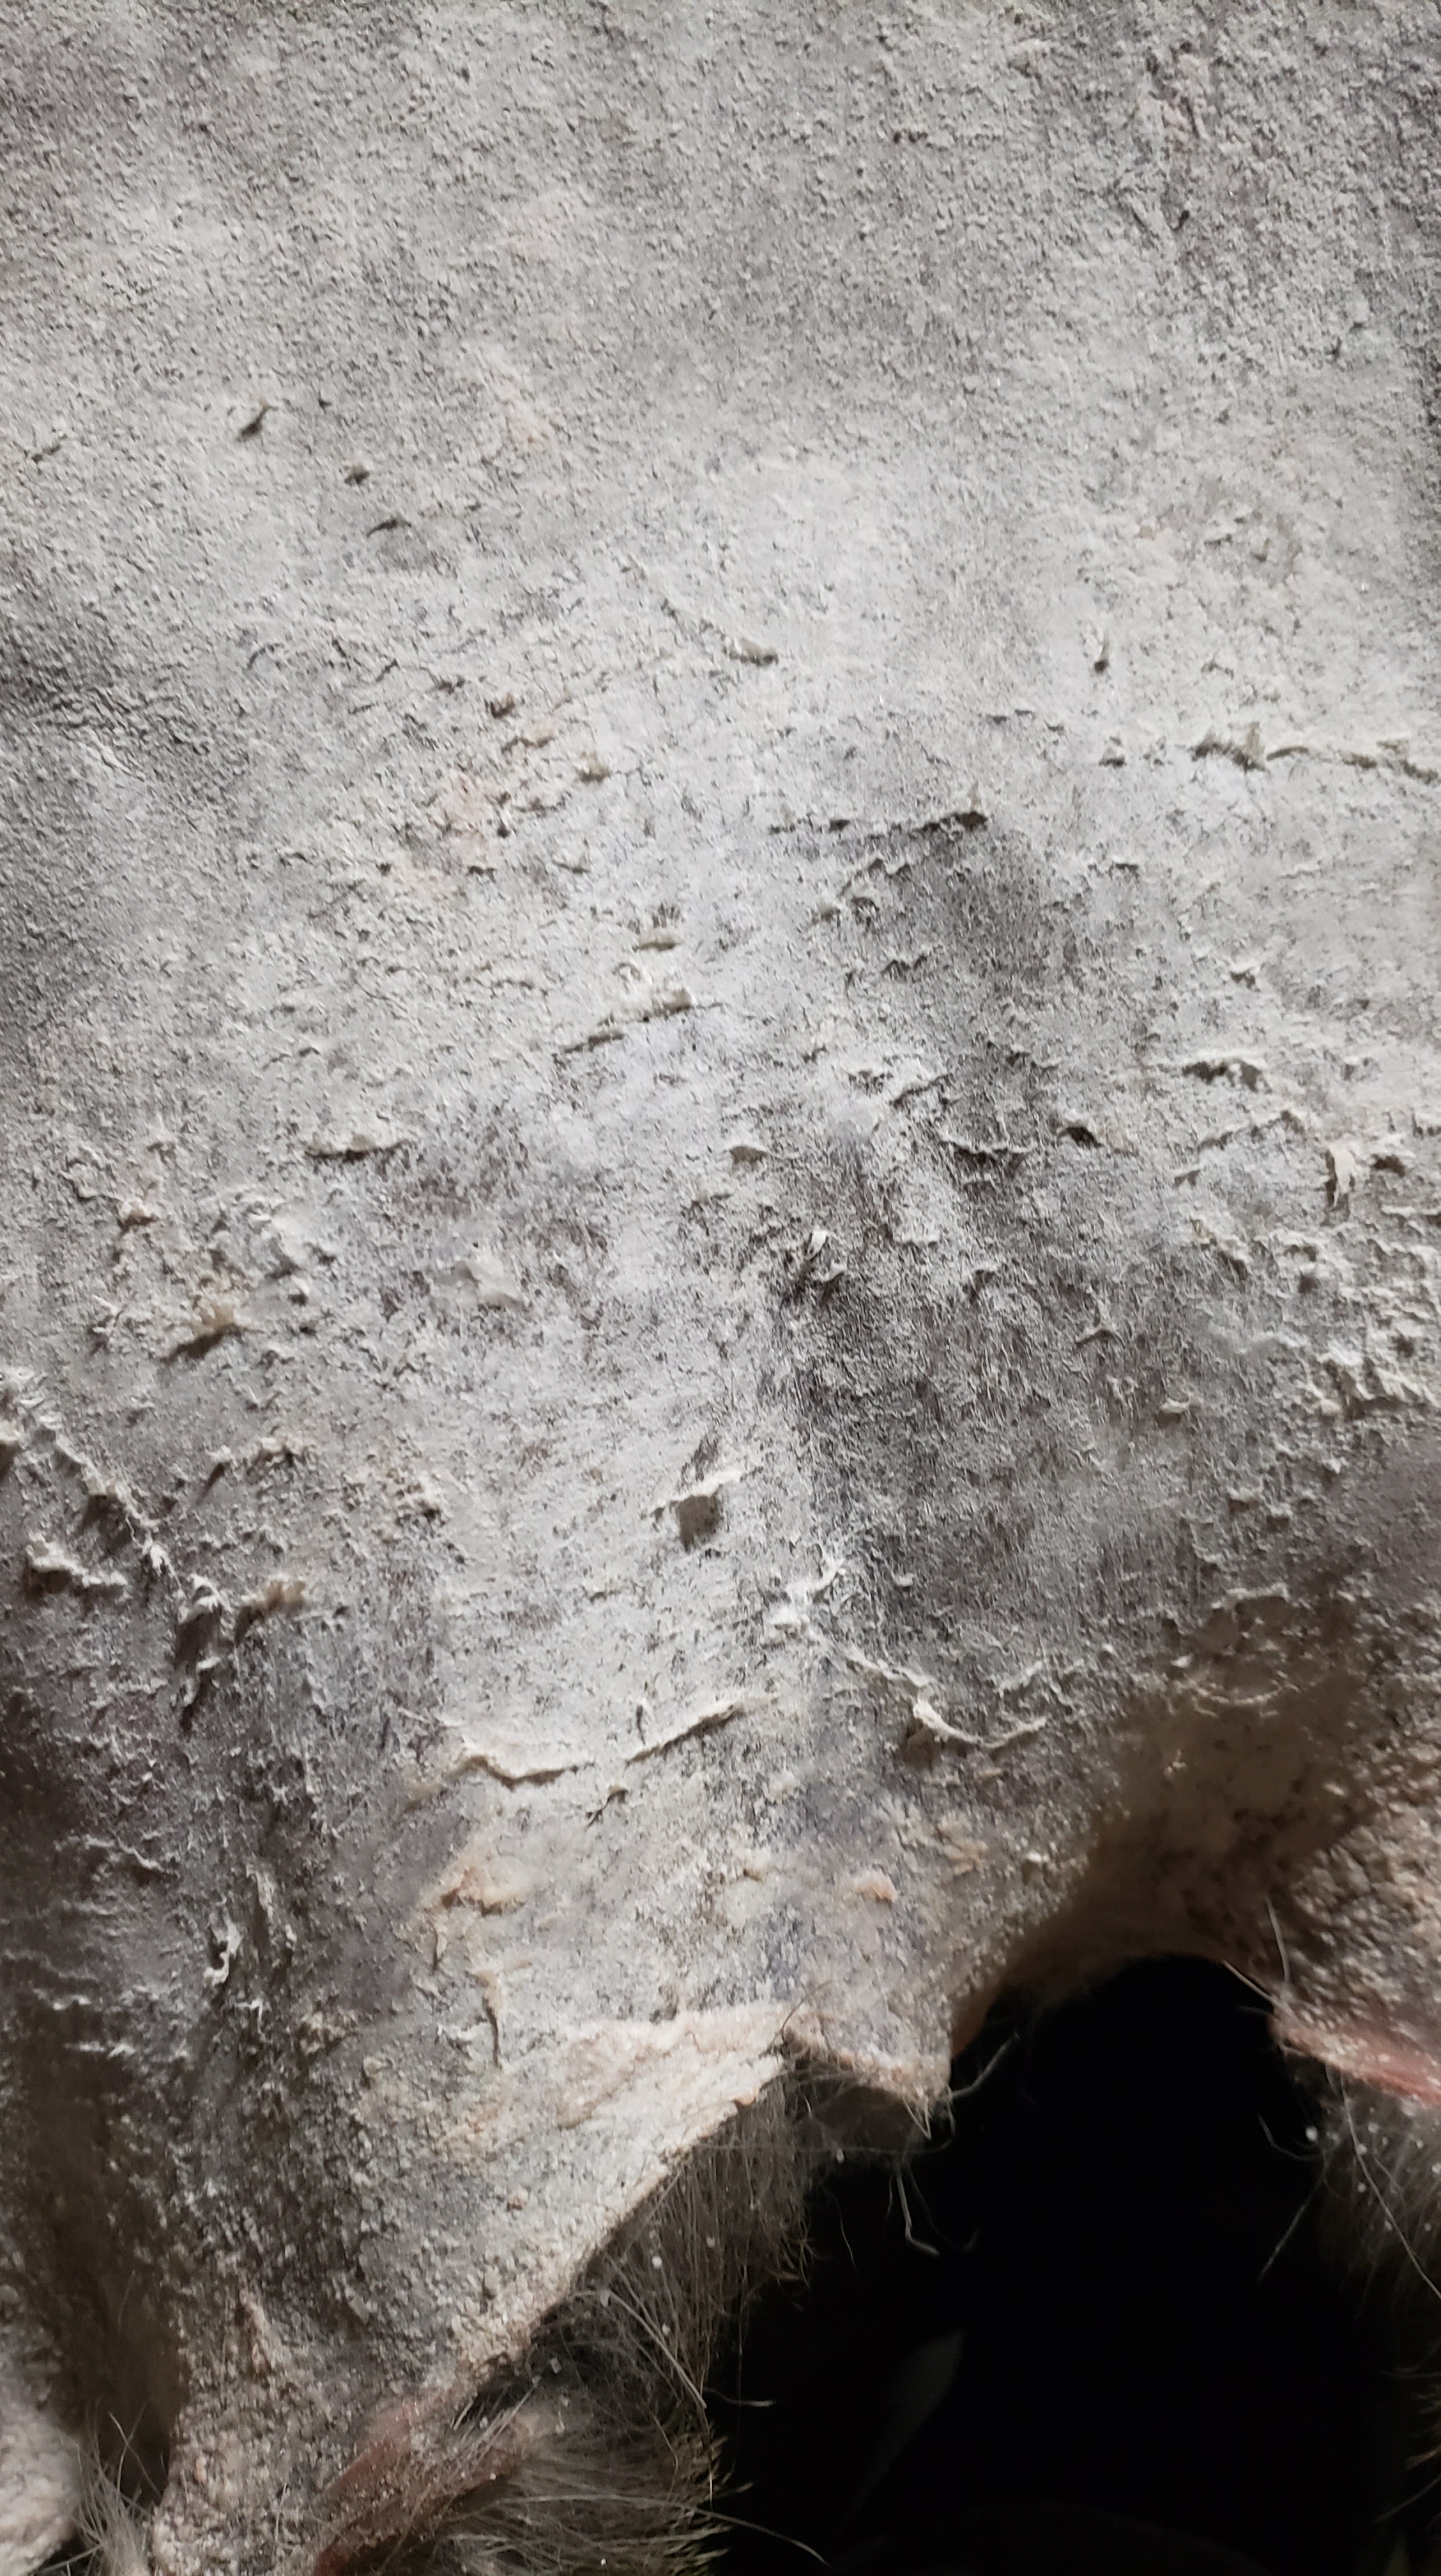
I also started dry membraning the custom deer skin.
Basically I just sat on the floor with it and scraped it with my dull tools. I needed to scrape off the stuck salt, and then get at the membrane. It’s not as dry as I thought it was (thanks weather!) so I didn’t get all the membrane off tonight.
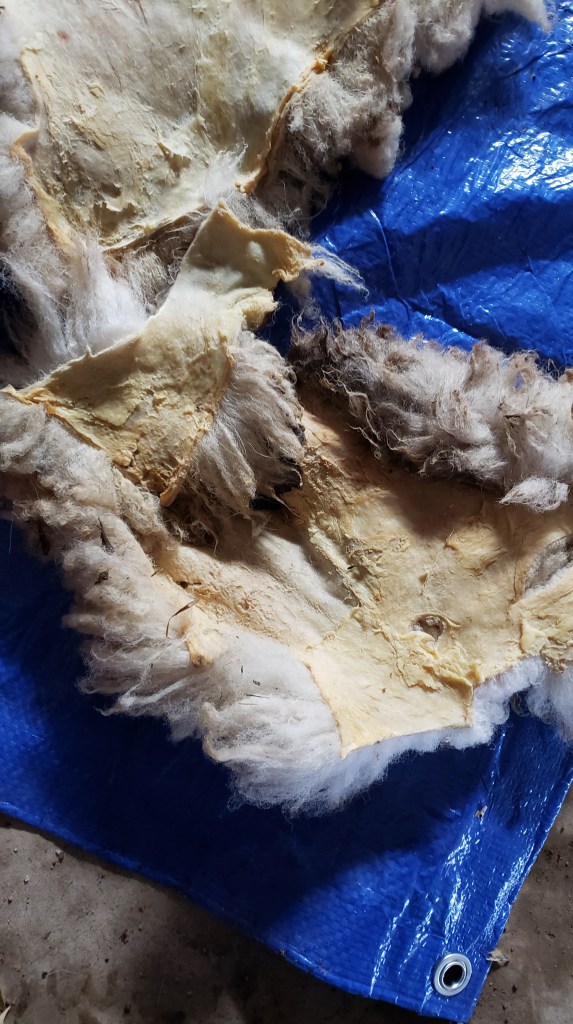
Hopefully you can tell from the photos what the membrane is, if you’re not sure.
The membrane is that thin, papery layer. It lives between the flesh of the animal and the actual skin. If you think of the skin as an organ (because it is…) it makes sense that it would be encased in its own membrane. Almost like the skin’s skin. Technically you can tan with it on, but removing it yields a softer more supple result.
I’d really like to get it off before I tan this deer. I just don’t enjoy wet membraning as much, and the cold isn’t conducive to it.
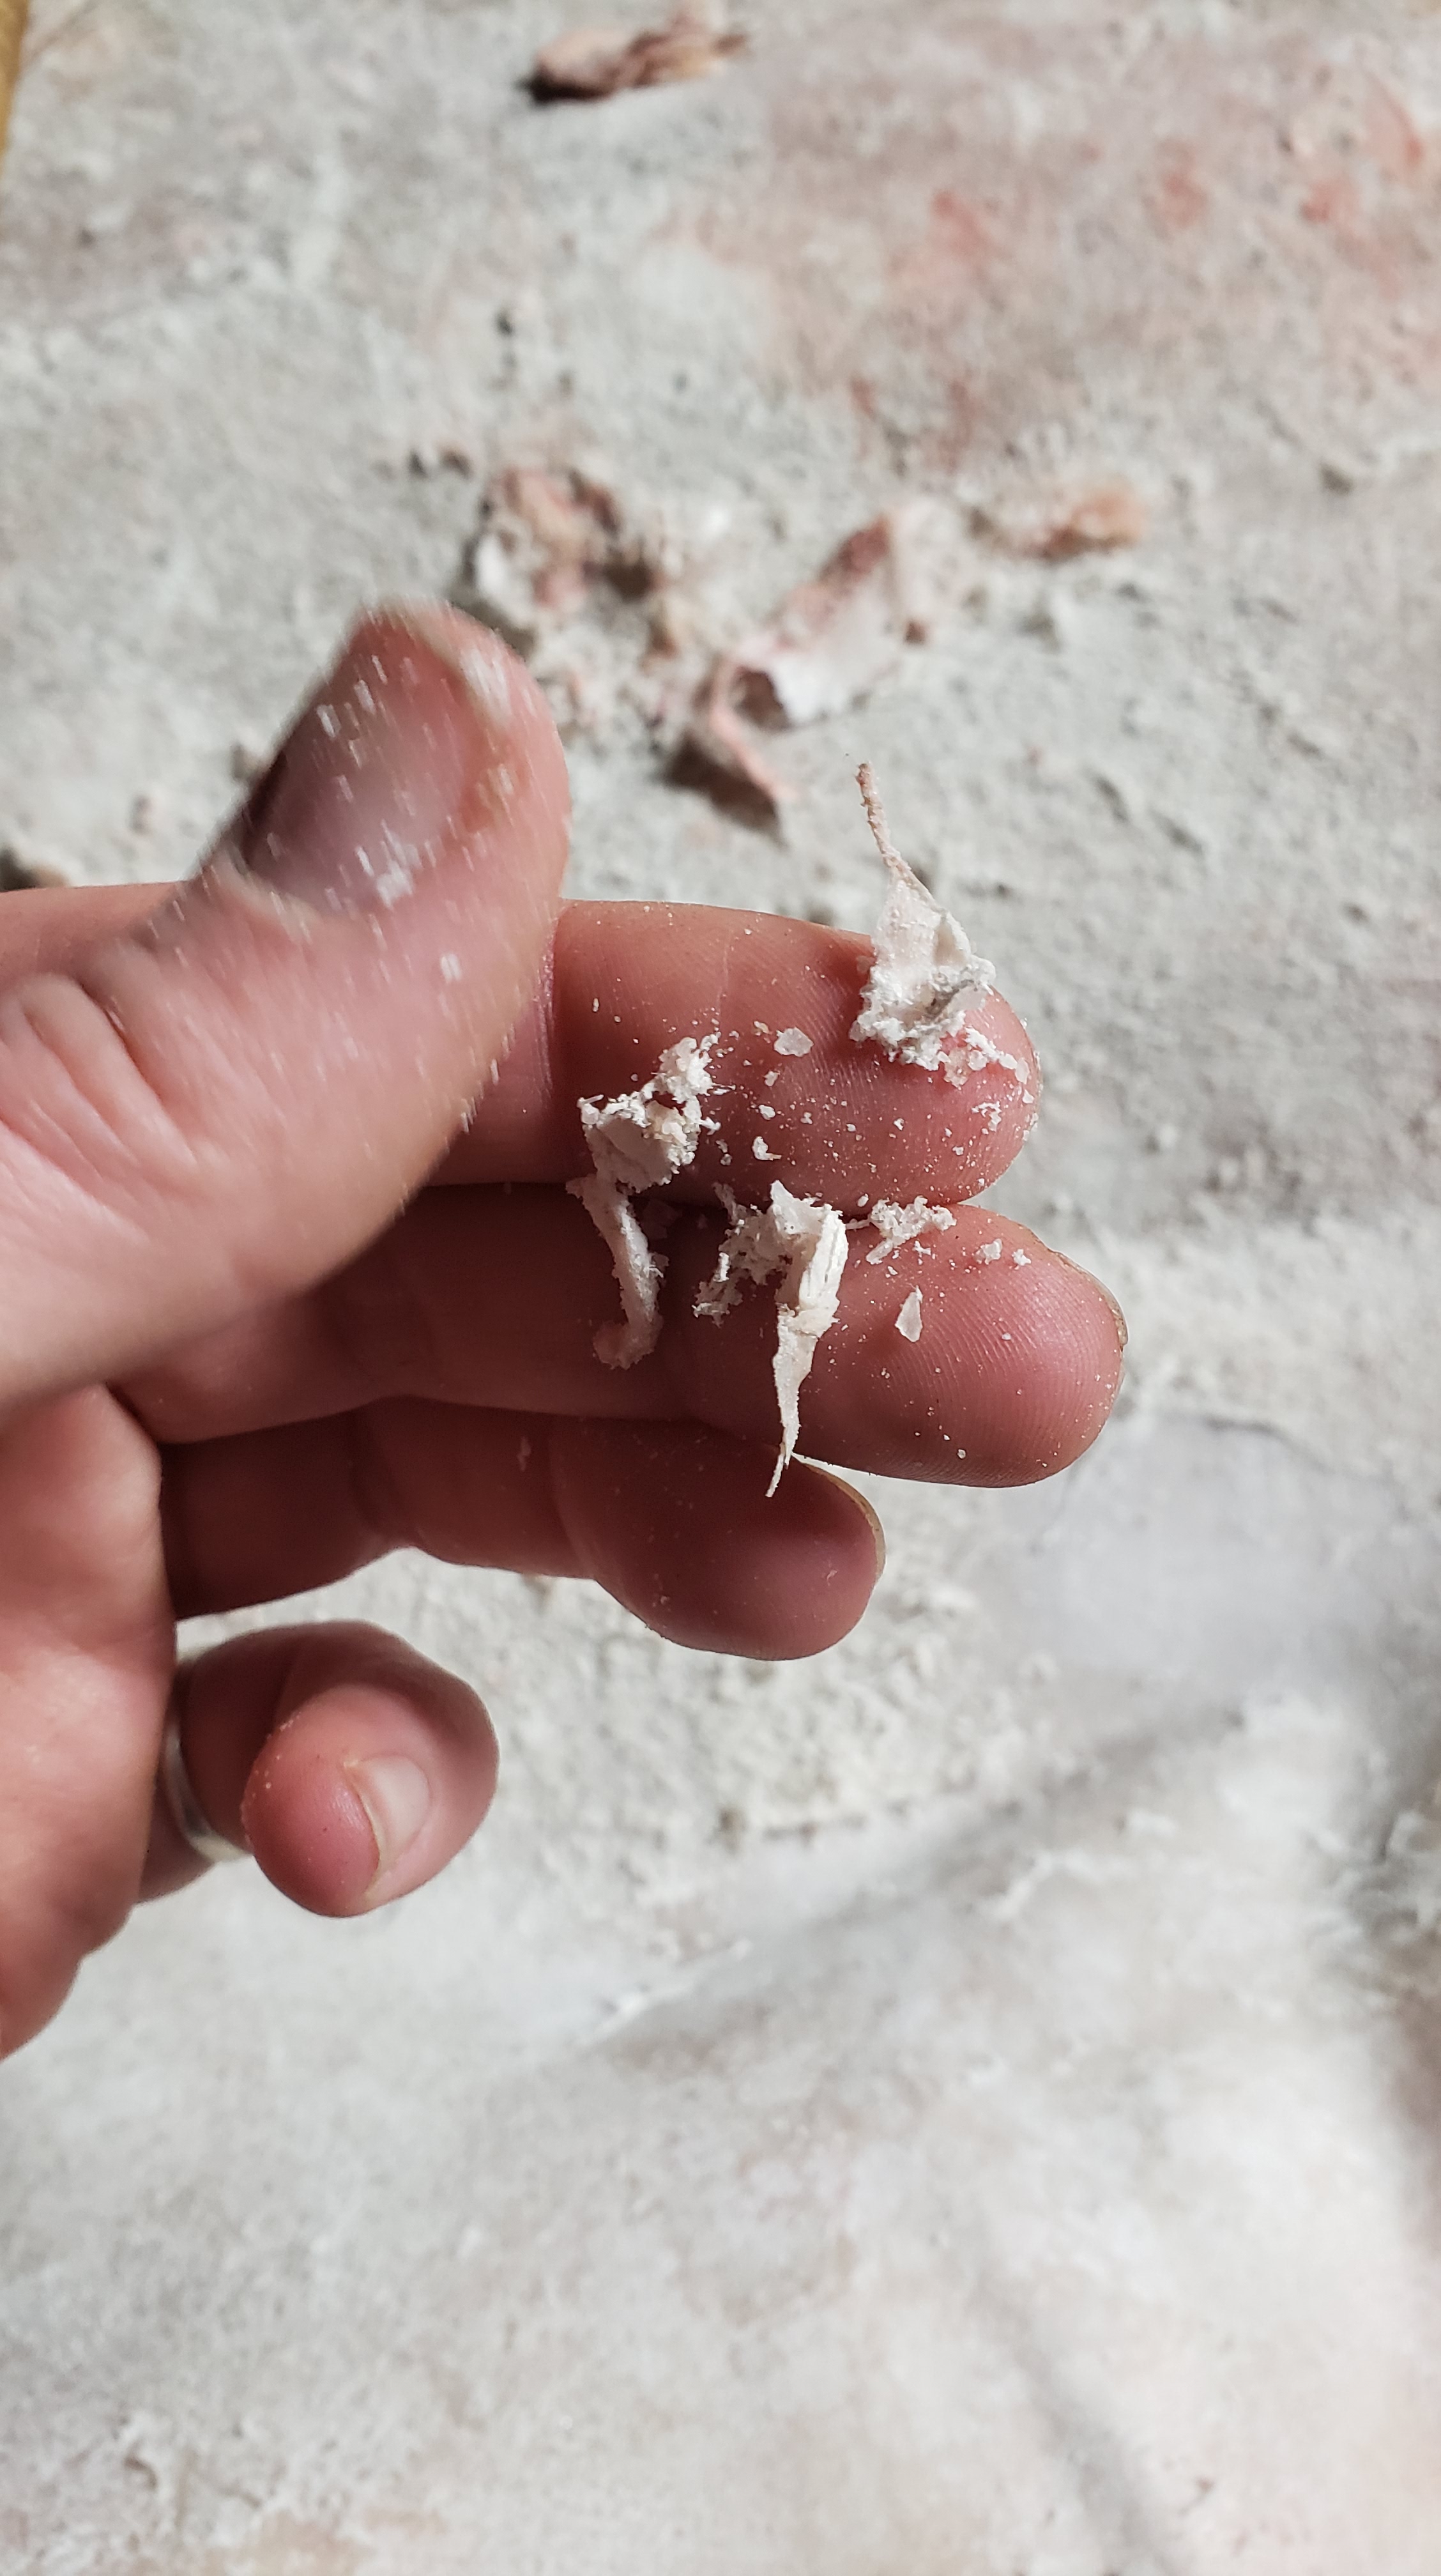
Those stringy bits are membrane I’ve scuffed up and not peeled off yet.
Next time I’m able to get back to it, it’ll be even drier and I’ll get the rest of the membrane off. I have some pumice coming, which I’m excited to try and expecting to be a tremendous help.
Progress is happening, but for the sake of my purse I wish it was faster.
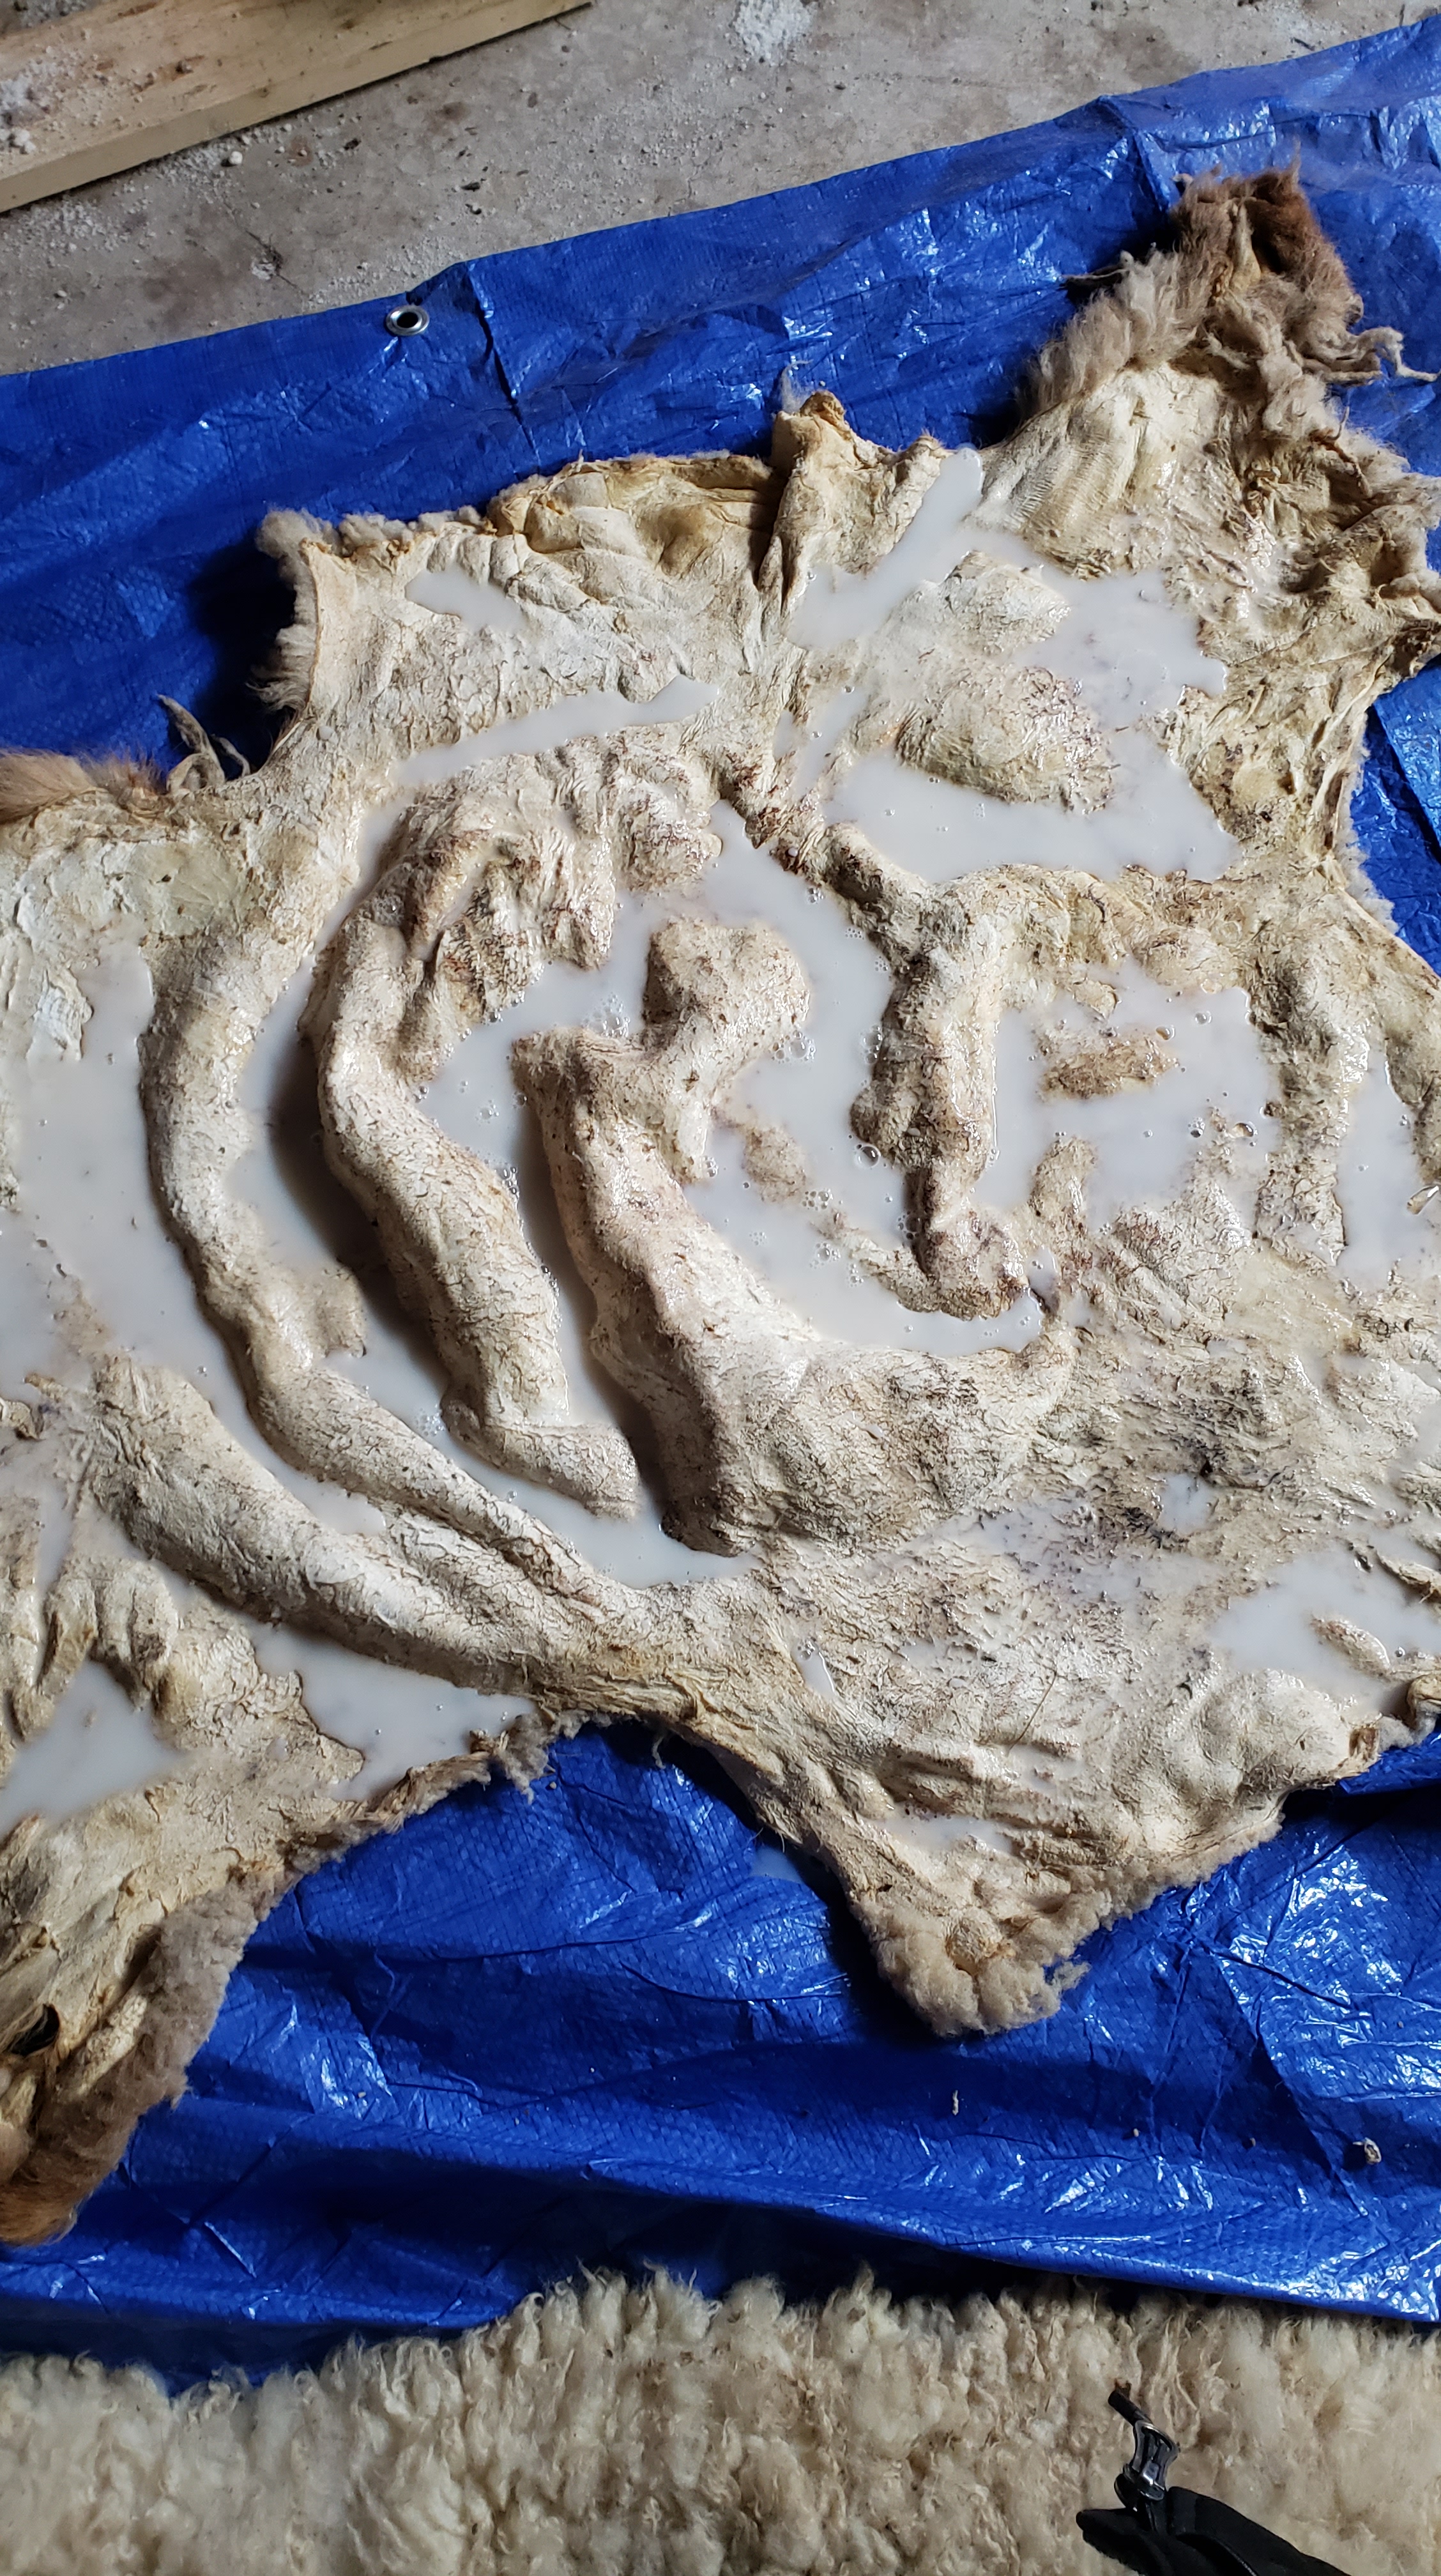
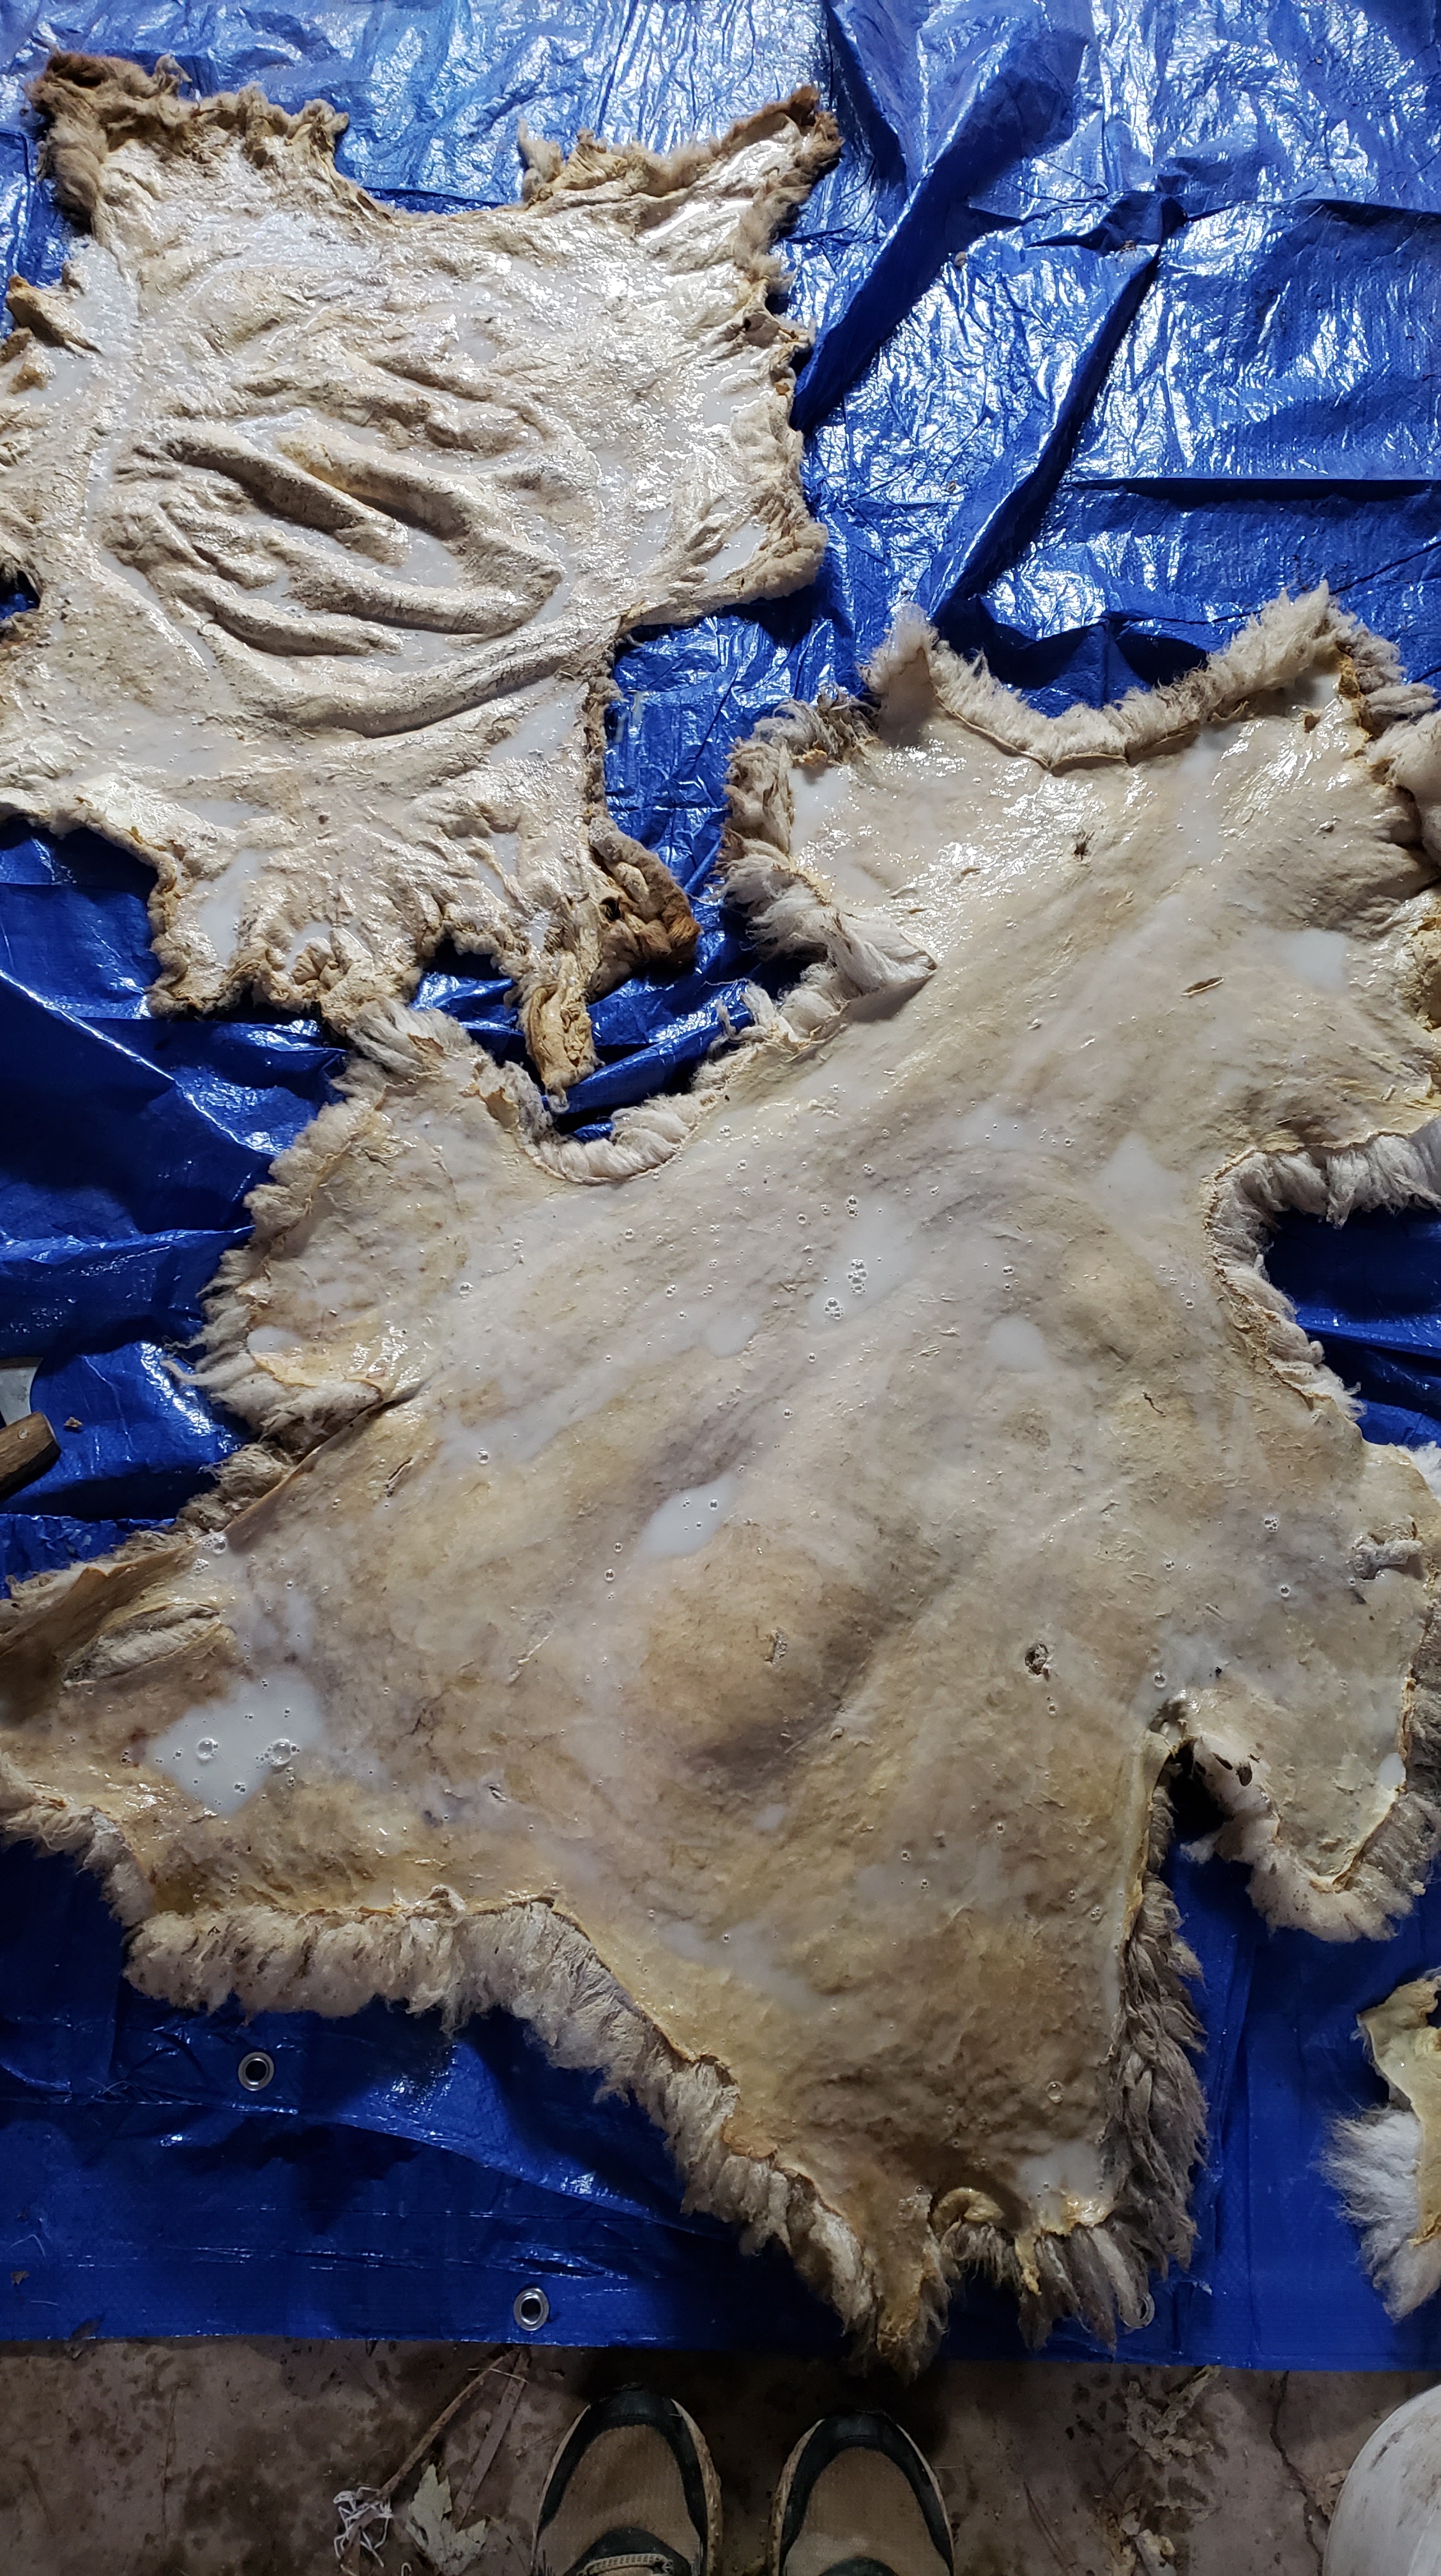
Progress on sheepskins today! I scraped the shearling that I’d recently pickled. It was mostly done already, but I got some membrane off.
I also stretched it a bit over my beam because it’s stretched unevenly, which I’ve noticed seems to happen easily with lamb skin. Then I got a tanning dressing on it. I used my trusty soap, water, and neatsfoot oil solution.
When I apply the tanning dressing, I spoon it on first to try to control it. I don’t like it running off the edges and sinking into the hair/wool if I can avoid it. (If you’re a real stickler for that, then make the dressing with less water so that it’ll have a more gel-like consistency when it cools.) Then I rub it in with my hands.
I scraped the large hide that I had pickled as well. It’s still soaking wet and not likely to get any drier until I get it on a frame, so I applied the tanning dressing to it.
It’s a bit oddly shaped. The edges of it were actually nibbled on by rodents; this happened because I hadn’t fleshed it fully before curing and storing it in my garage for, oh, years. Rodents will apparently eat salt-cured sheep fat, and happily. I don’t usually trim hides until I’m done stretching them, but I made an exception here and cut off a couple parts that were just silly.
These two hides will sit with their dressing for at least 24 hours.
I’ll hand-stretch the shearling, but the full-fleeced hide will have to go on a frame; it’s the only way I can imagine the wool will dry. It’s just so wet still, and not going to dry easily in this freezing, snowy weather we’ve been gifted.
I need to get the woodstove set up in my shop, but I also need to buy a couple pieces of chimney pipe and I’m quite broke at the moment (life, etc.) so it’ll have to wait!
I’m very grateful to have sold two sheepskins recently, and to have the potential for some paid custom tanning in my near future.
It’s so important to listen to your body. Yesterday I rested from hides; today I worked. I got a text that made me happy. “I have deer hides, you want?”
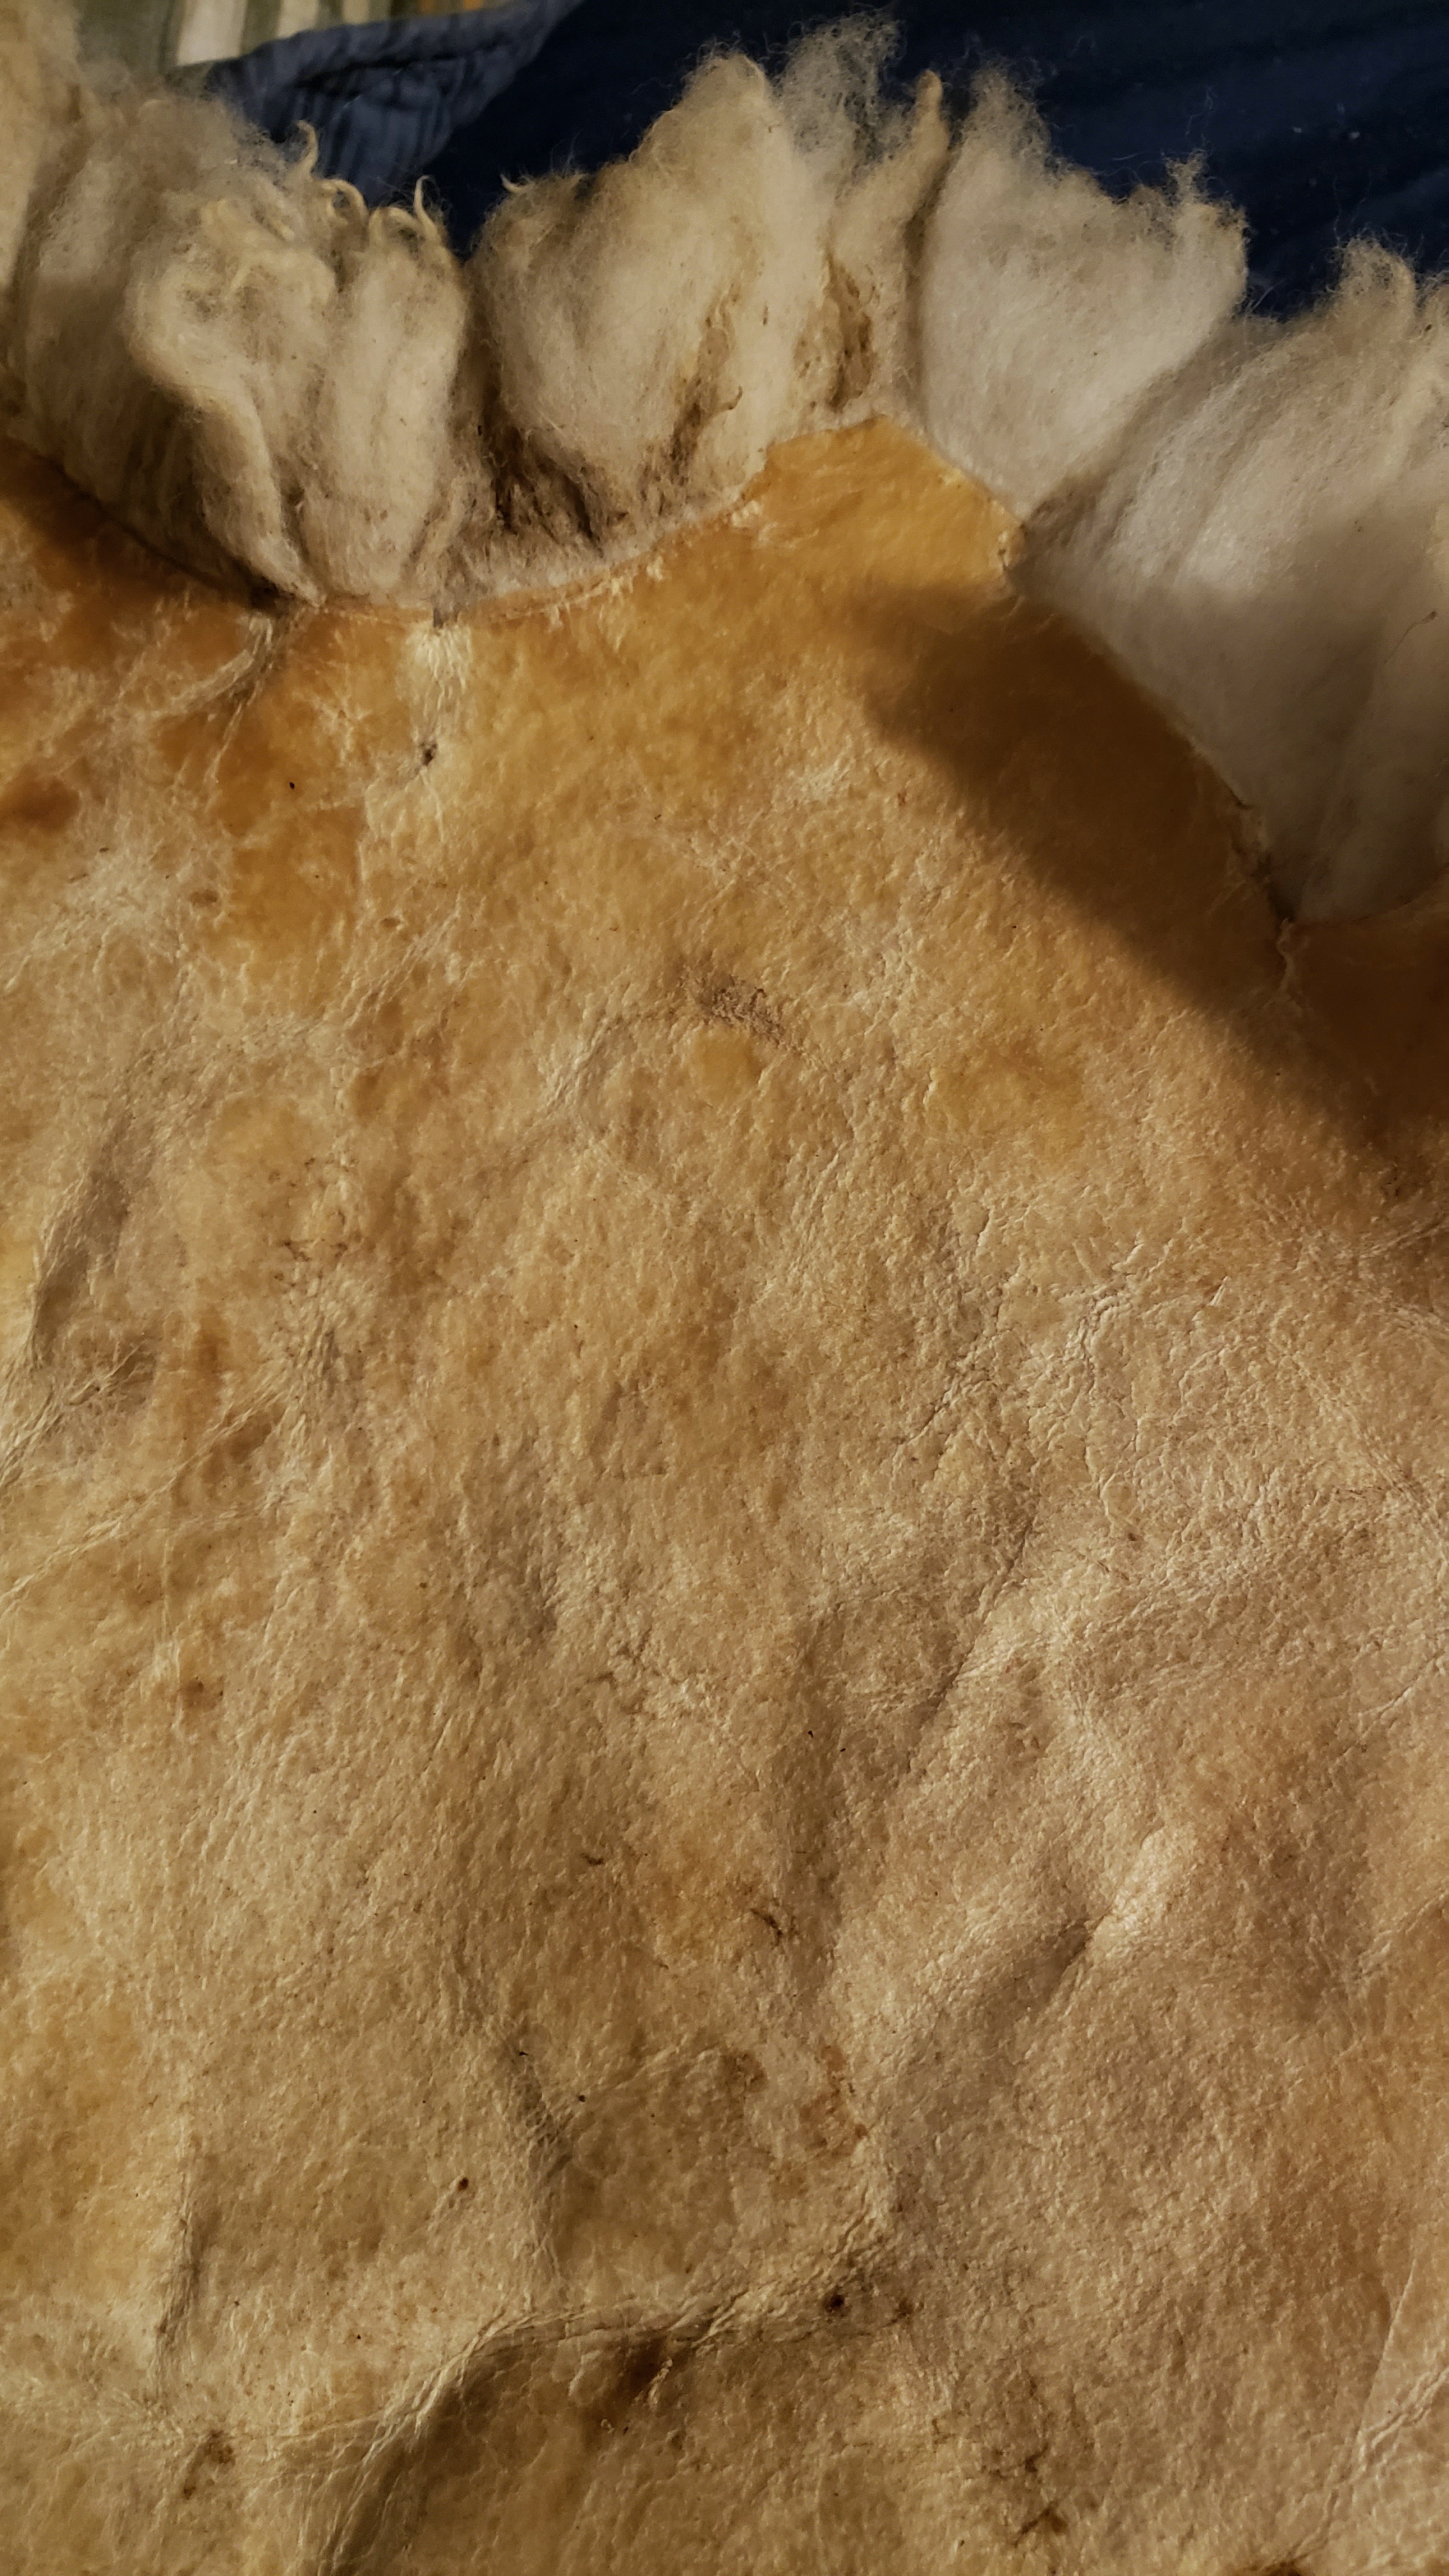
So, let’s talk about fleshing.
I actually did two types of fleshing today: what I call dry fleshing and wet fleshing. The difference is in whether or not the hide has been salt cured (or dried another way) or not. Often I flesh hides before I salt them, and other times I salt them first and flesh them later when I have more time.
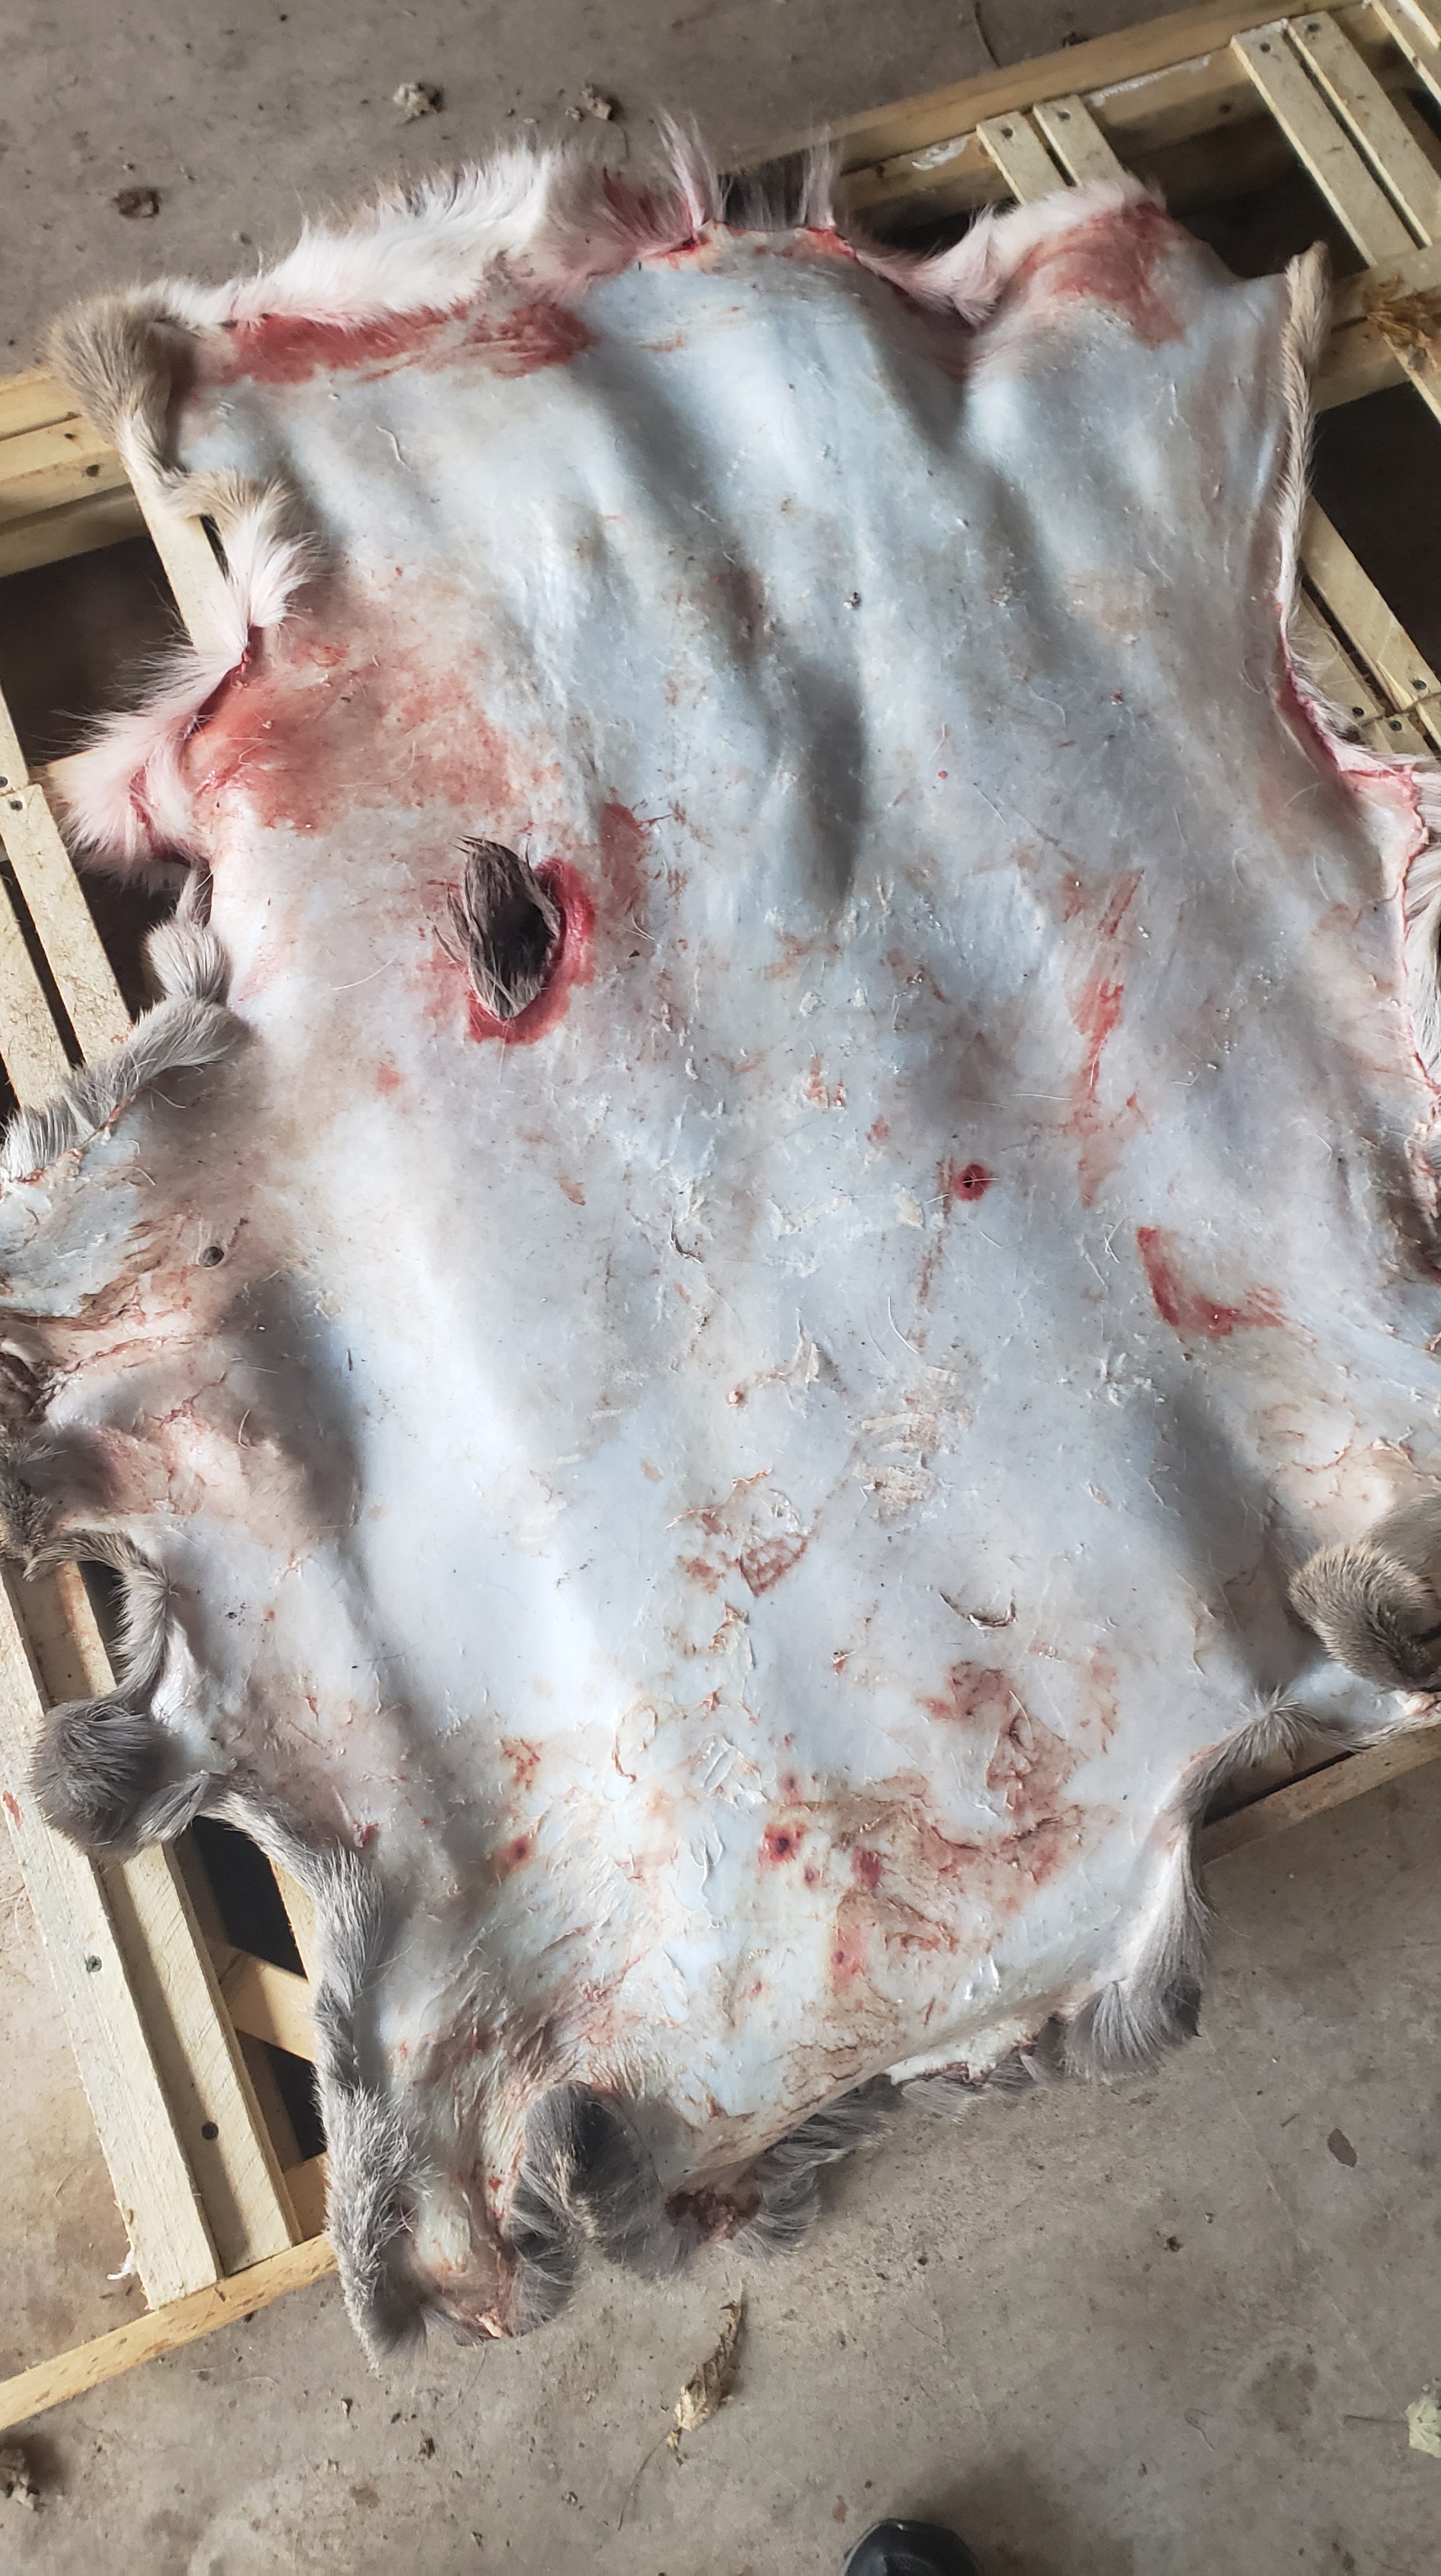
I used to think dry fleshing was easier, but after today I’m not so sure. Here’s a sheep hide i was dry fleshing.
When dry fleshing it’s harder to mar the skin with gouges, but easier to cut cleanly through it because it’s less elastic and more brittle. I use a dull Ulu or dull draw knife. It’s important to hold the blade at an angle to the skin, between 45 degrees and perpendicular.
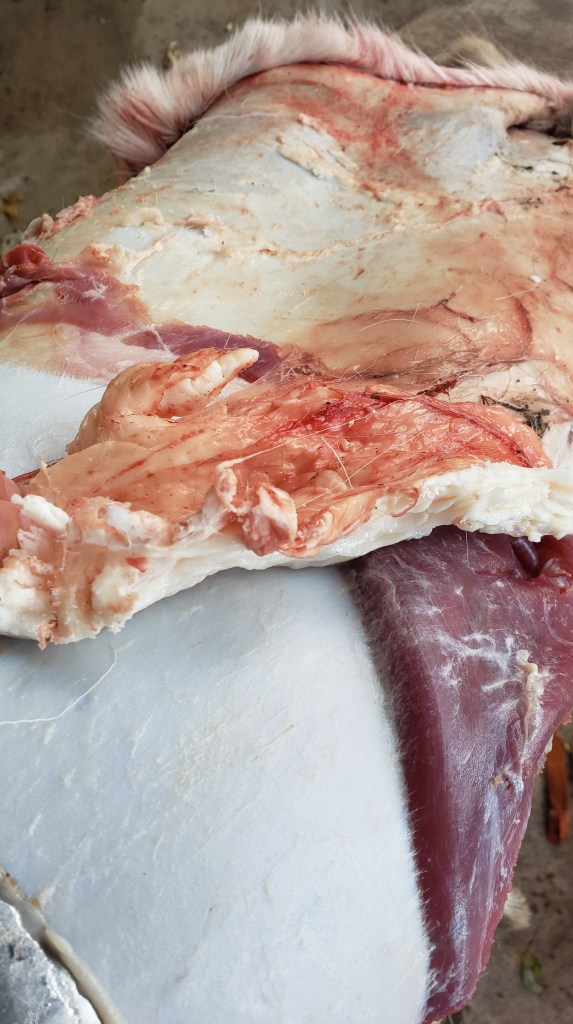
I find with wet fleshing I can usually remove larger pieces of flesh (fat, muscle, and sometimes skin membrane) at a time. Look at the way I’m holding my tool to flesh this deer skin.
I fleshed two large deer hides in about 3 hours, which included a break to nurse my baby (plus wash up first, duh) and have a quick lunch. That’s pretty good time for me, especially since I haven’t done it in a couple years. But my hands remember even if they’re softer than they were once.
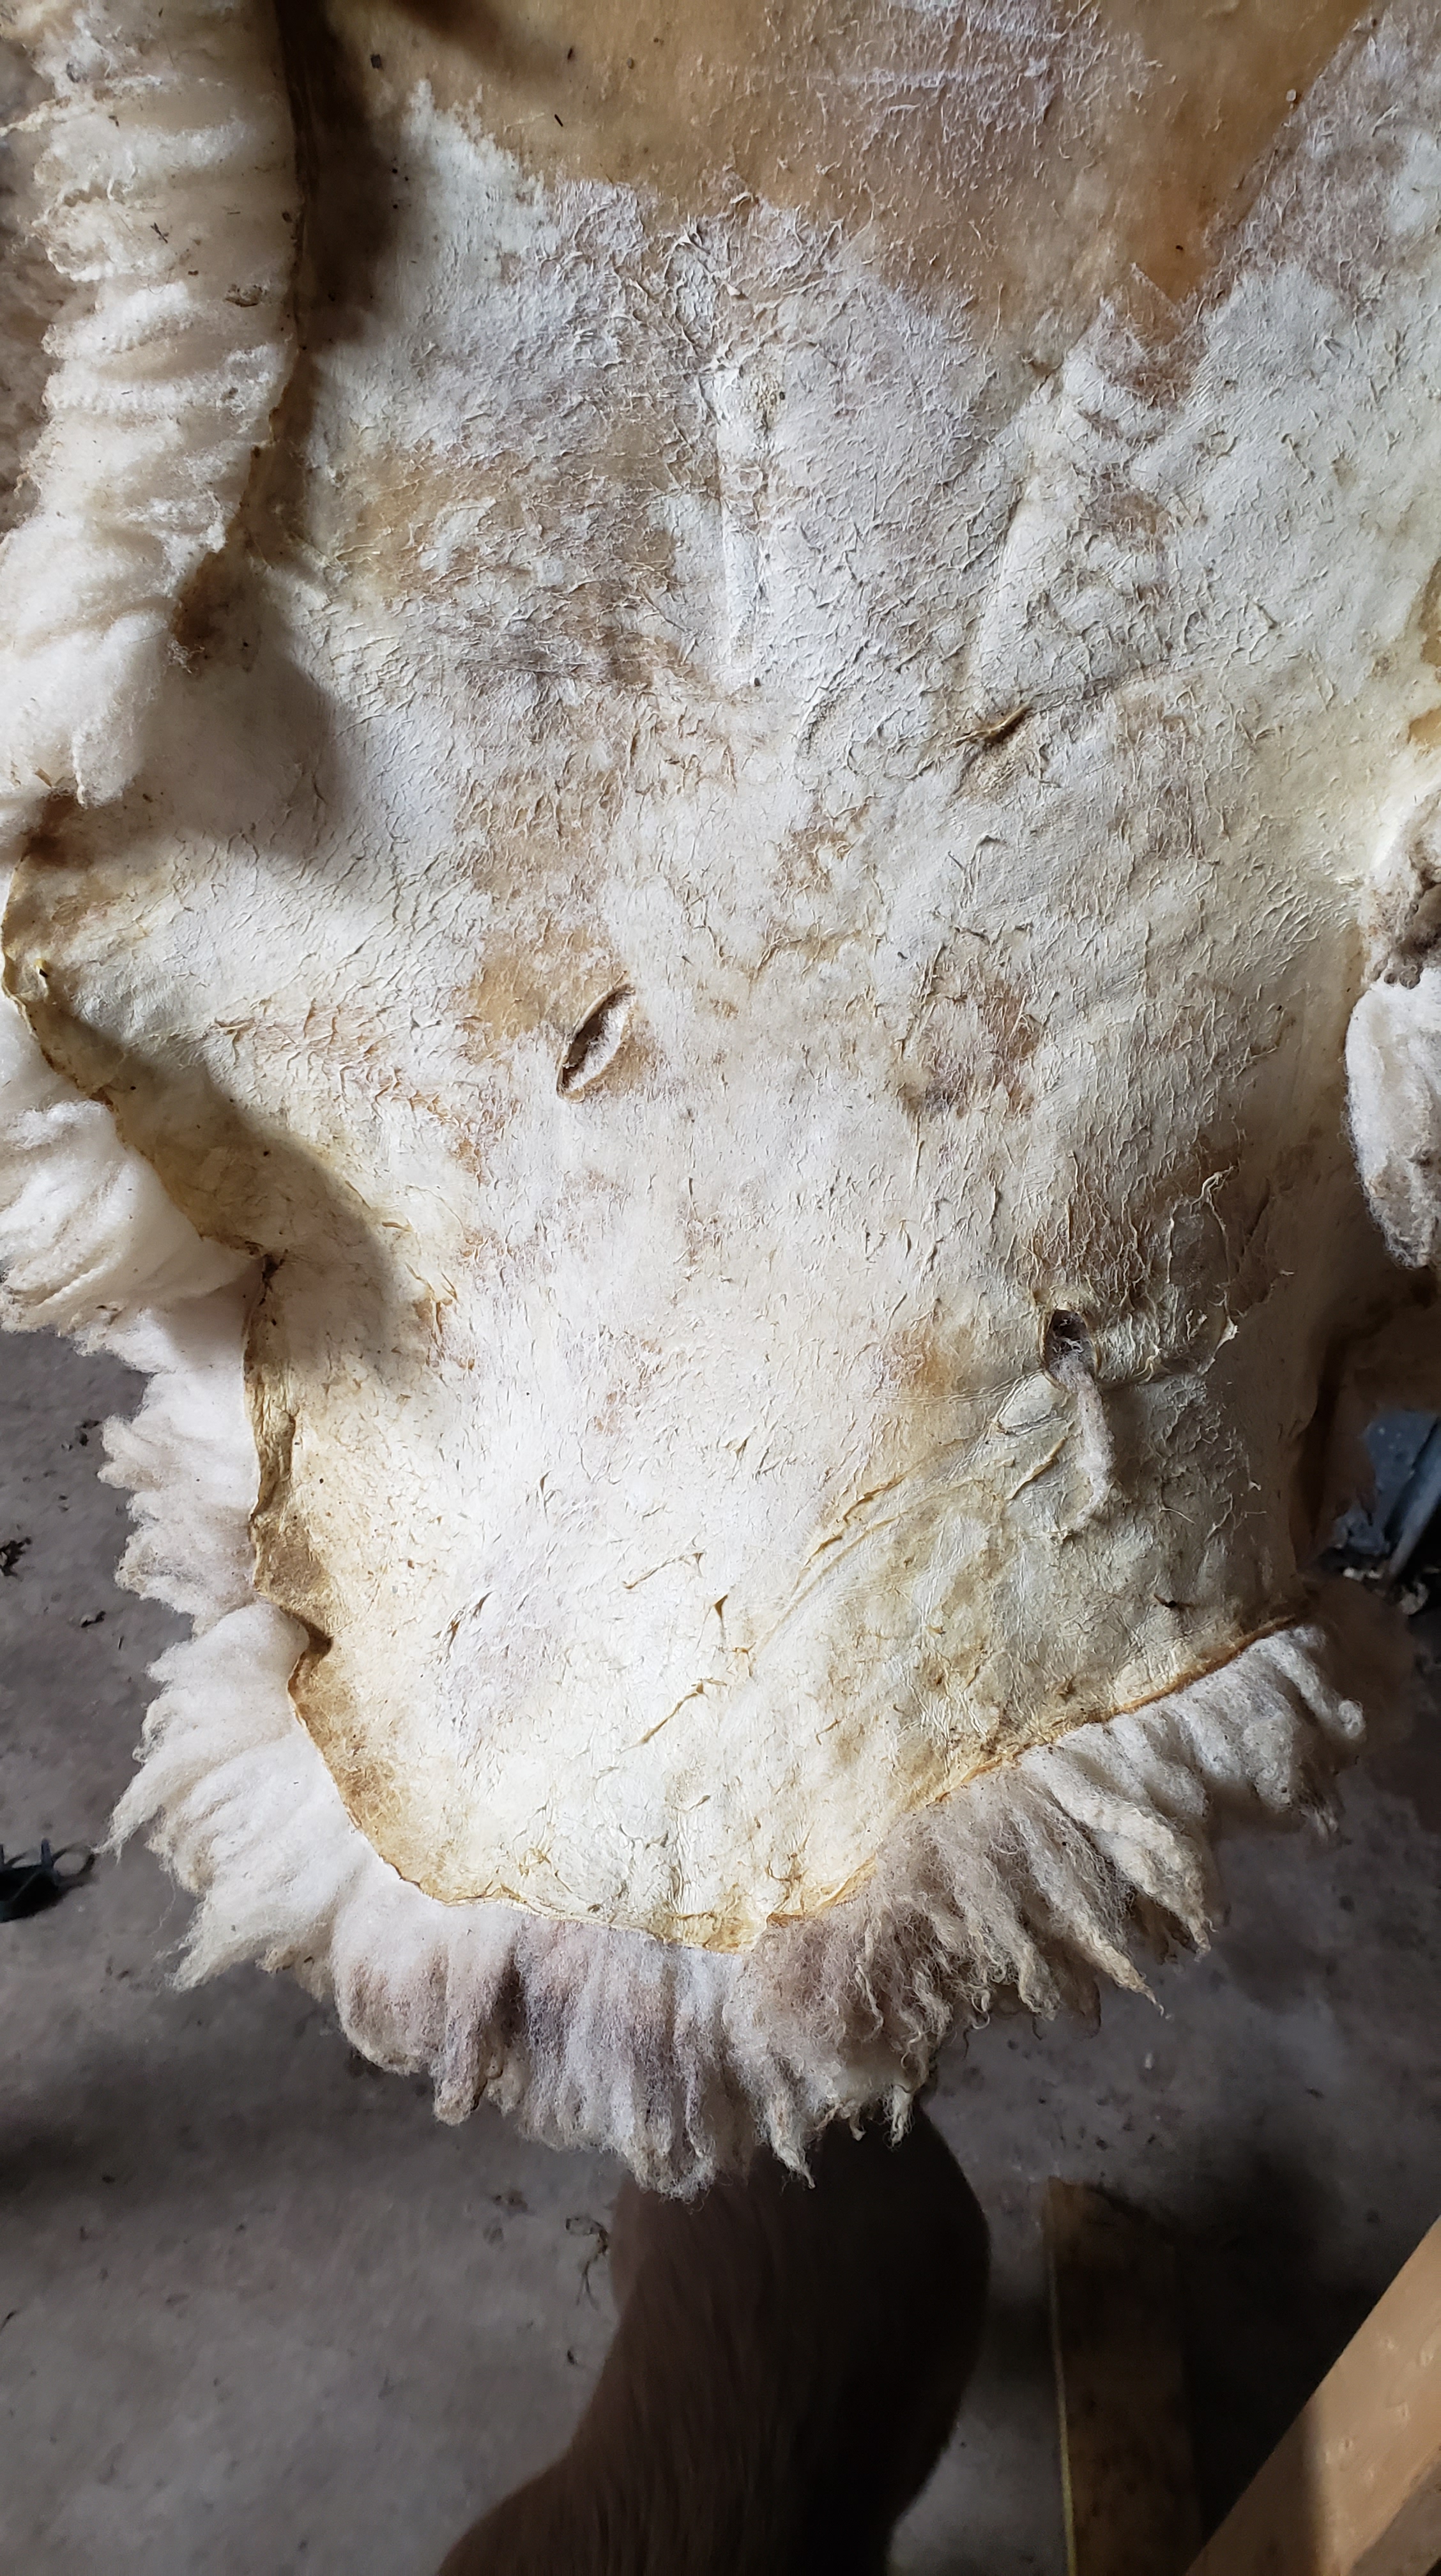
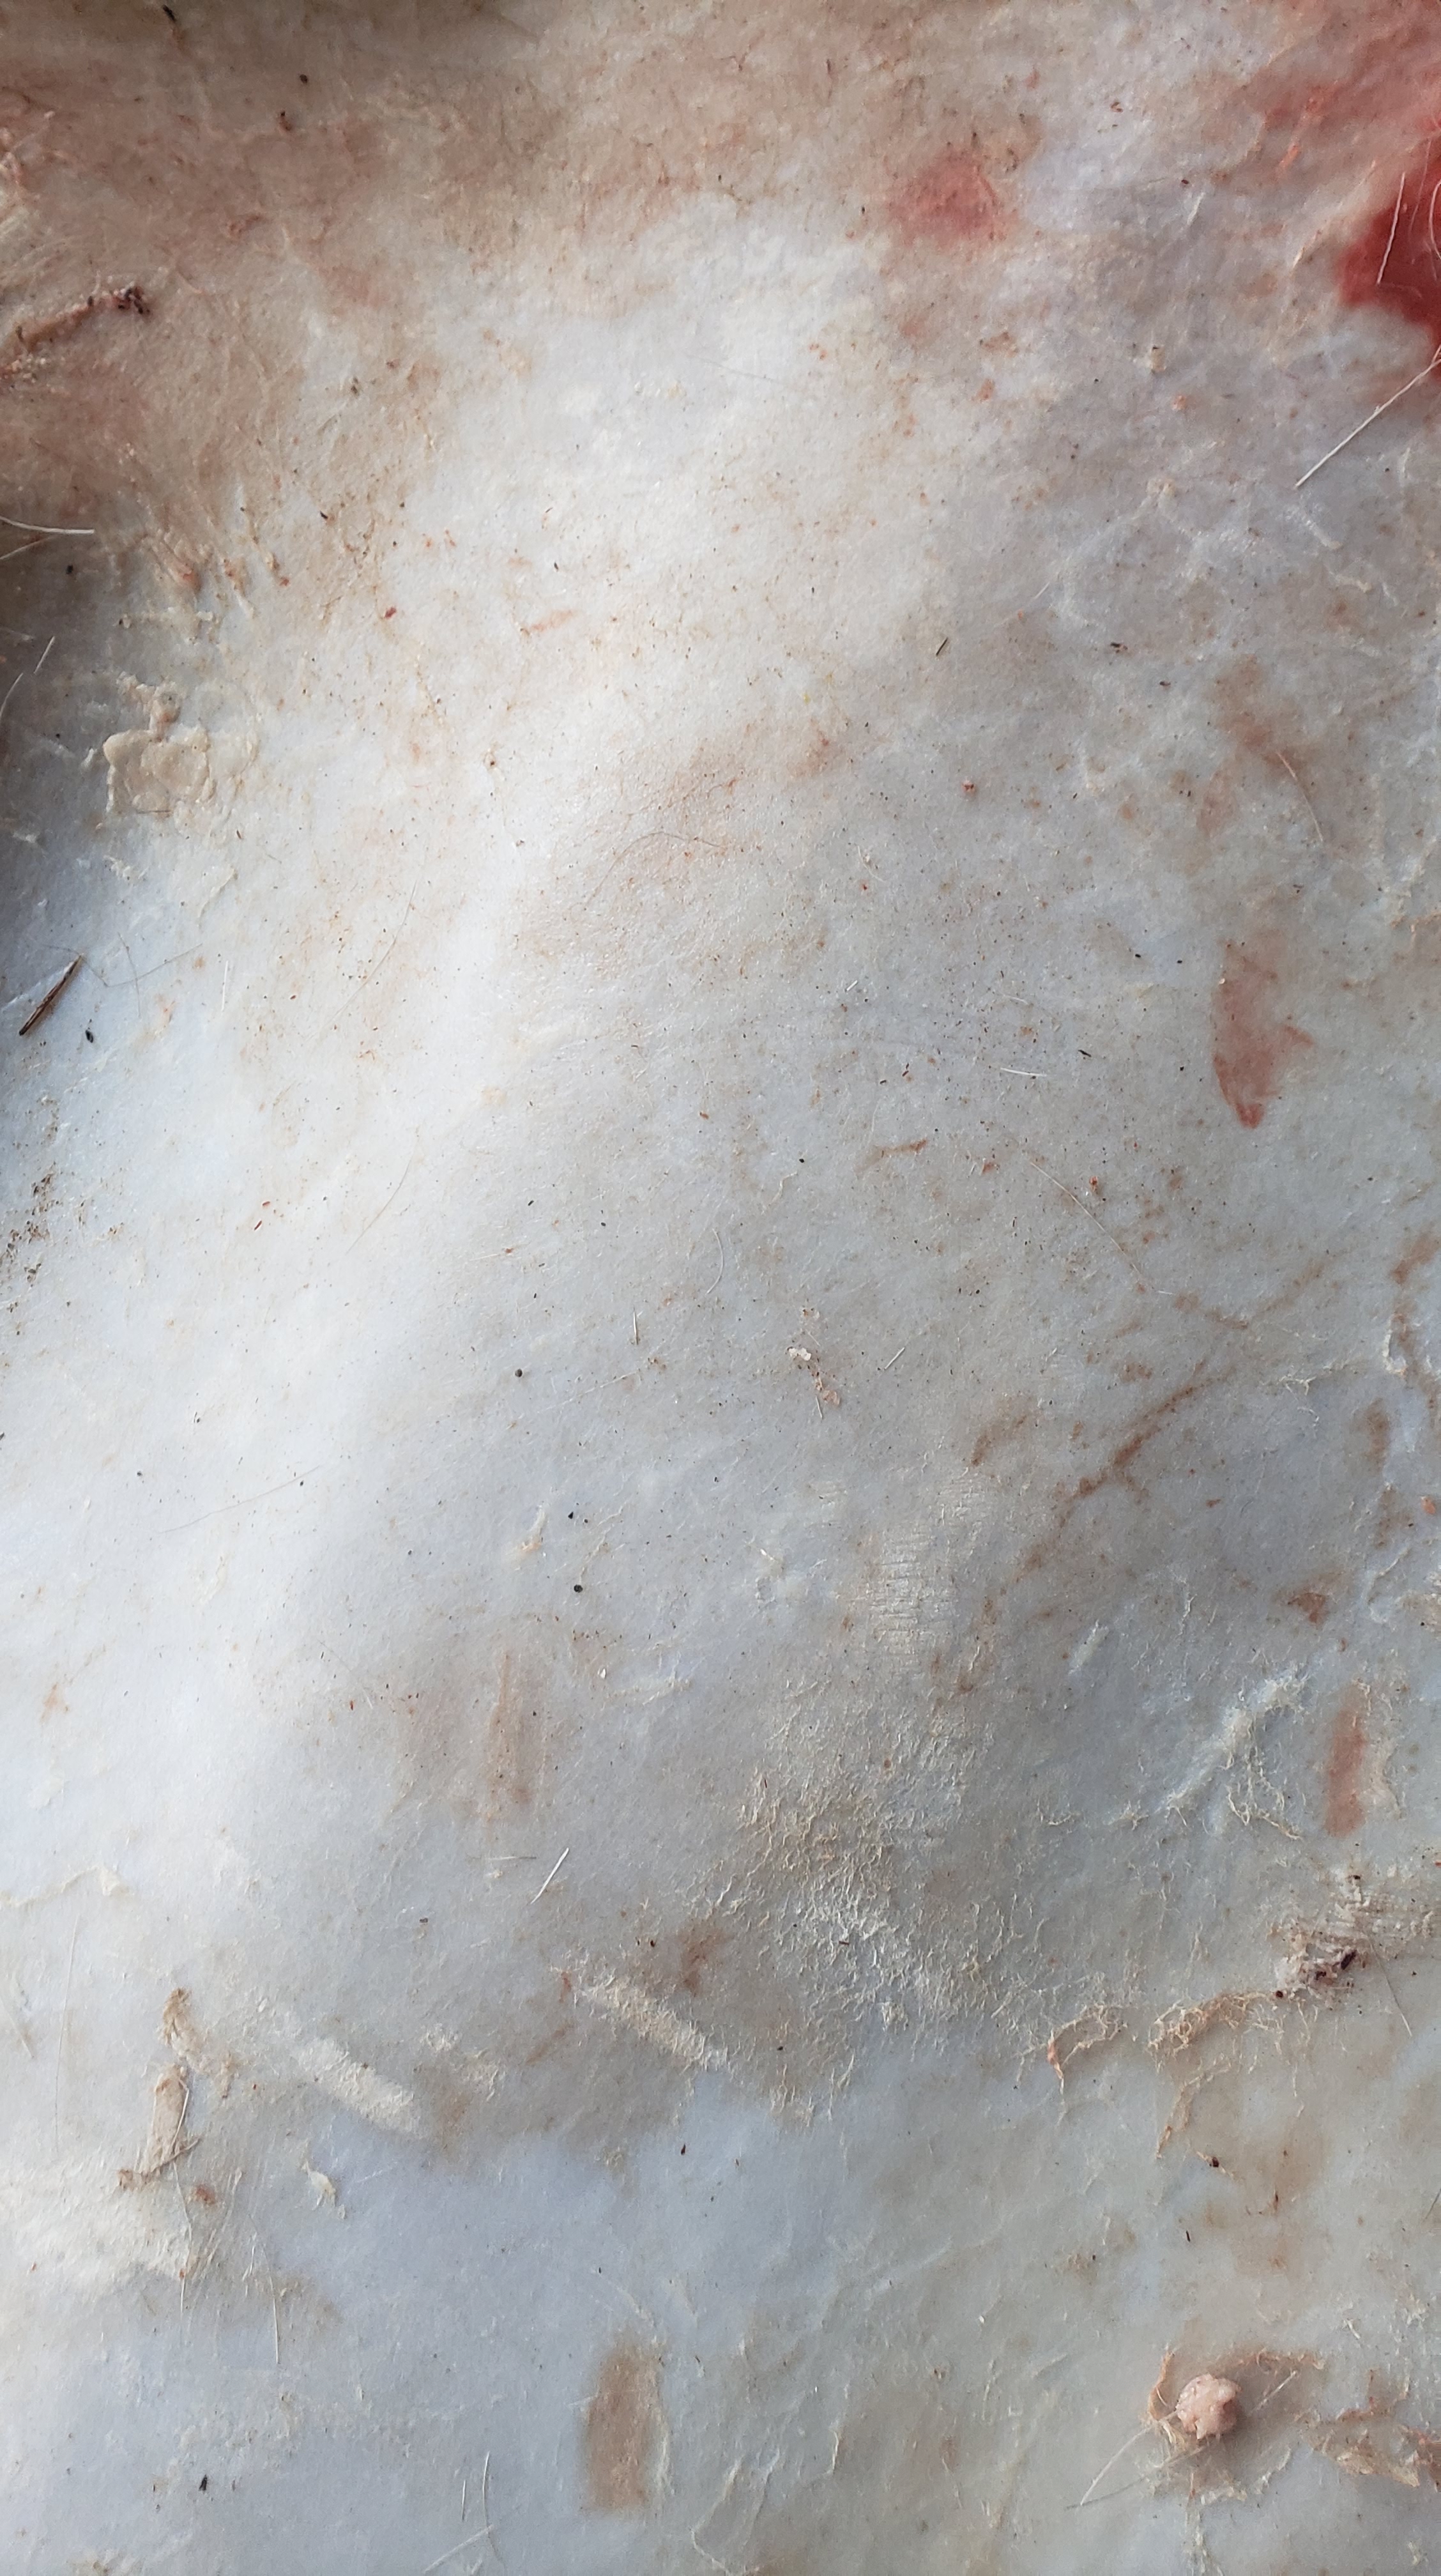
When fleshing a hide before the actual tanning step you want to remove all the flesh and fat. Sometimes, depending on the animal, the difference isn’t clear. On deer, sheep, goats, & groundhogs it’s pretty obvious.
The actual skin is so white it’s almost blue. And there’s usually an obvious, clear, stringy substance between the actual skin and flesh.
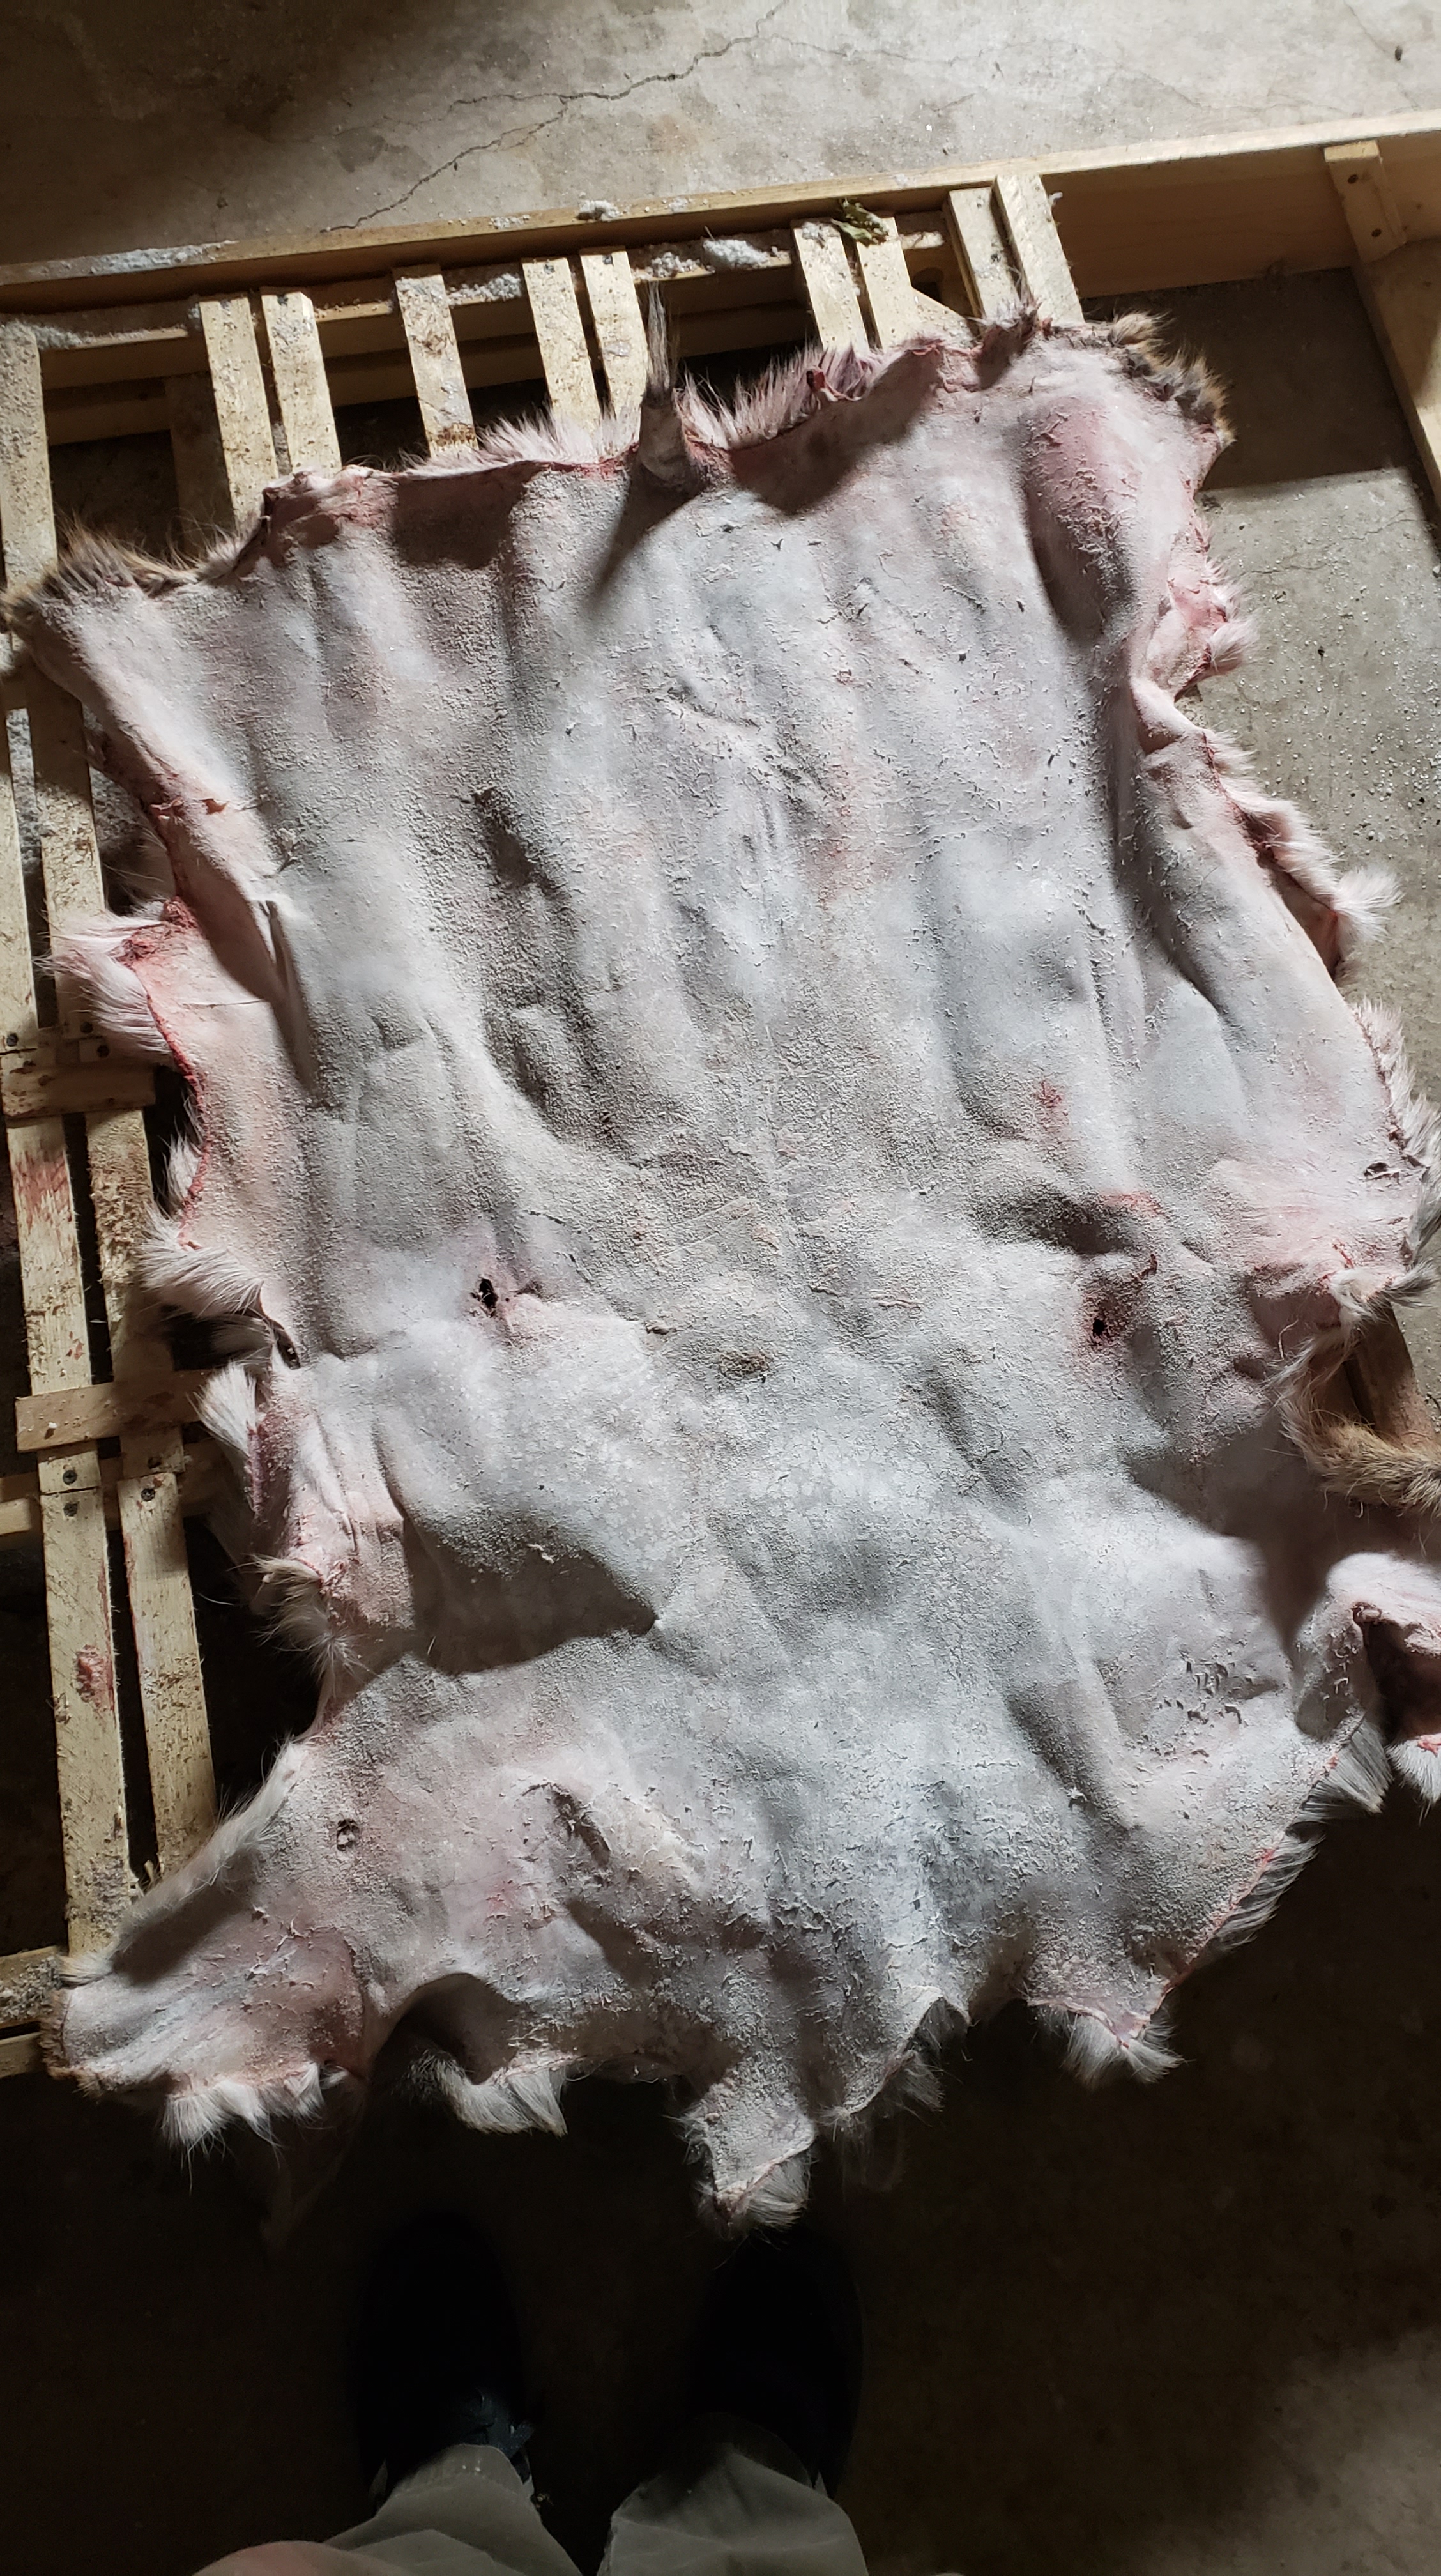
Some people say that you have to remove every scrap of flesh and fat before you salt, but you don’t. Trust me. I’ve left entire hides under salt without fleshing at all and they’ve been fine. If there are stubborn bits, get them off when you membrane before tanning.
Ideally the skin looks like this after fleshing.
Don’t worry about the bloody spots – the salt will draw out the blood.
After I got this skin fleshed, I covered it with agricultural salt, sometimes called mixing salt. I like it because it’s loose and coarse and a 50 pound bag is cheap. Now, I know some tanners swear you have to cover a hide 4 inches deep in salt, but I never do that. I throw several handfuls on the skin and run the salt in. I do pay extra attention to bloody areas, but ultimately I use a fairly thin layer of salt. It’s really important to get it everywhere, don’t miss the edges. Anywhere that isn’t salt cured is susceptible to hair loss and skin rot.
Depending on how the animal was skinned you can end up with a bucket of stuff you cut and pulled off. If you’re interested in cooking the meat for your pets and rendering the fat, they’re pretty easy to tell apart. The fat that’s worth rendering, in my opinion anyway, is these big chunks.
I plan to render them for soap. We’ll see if I have time.
Both of these deer hides have good fur but some butcher cuts and other imperfections on the skin-side, so I’m going to tan them both hair on. The hunters I got them from say they could end up with 3 or 4 more, so I’m hoping to make some buckskin.
Next up for these hides: I’ll fold them in half tomorrow if they’re dry. If not, I might add more salt if it seems needed. Then they’ll wait to be membraned and tanned – I want to finish at least one more sheepskin first.
Yesterday I gave the two wooly skins a final brush out and pick through, and called them finished.
The sheepskin that started out this process “brittle” just isn’t quite up to my standards – towards the bottom of the hide, the hind leg area, the leather is still too brittle for my liking. It’s a fine hide for a seat cover or small rug, but I’m not going to offer it for sale because it just doesn’t represent my best and desired result.
It’s not as dramatic to the eye as these pictures show, but you can tell by the color shift where the lower quality leather starts.
The other skin, which I’ve taken to calling big and creamy, turned out quite nice. I would wear it close to my skin, which is how I want to feel about my tanned hides. It’s listed for sale through my Etsy shop.
The shearling hide is also basically done; I’m doing some extra nit-picky softening and removing what’s left of the membrane because I think I want to make some mittens out of it.
Results of finishing the 2018 skins, round 1
I’ve relearned and learned some things. Like don’t leave your dressed leather in the sun for long periods without working on it. Like that alum really is my best friend when I’m doing big batches of skins and need to borrow time. Like how important getting the membrane off really is.
I feel I have a much better plan moving forward. Speaking of which – what’s next?
I have 3 wooly sheepskins still sitting dried from salt and alum. One at a time, I plan to dry scrape and membrane them really well, then rehydrate in a salt water bath. I’m not going to make decisions based on where I think I left off tanning this time – I’m just going to go through all the steps of my process as though I had just fleshed and salted them. So after rehydration, they’ll get a tanning dressing, softened, and smoked.
I also have 2 dried shearlings left that will get the same treatment.
Additionally I want to experiment with vegetable tanning, AKA bark tanning. I have scraps from the skins I just processed that I can play with. More on that later.
And finally, I just can’t give up on the brittle one. I mean, look at the wool!
I want to try rehydration again, and dress it again. And soften it again. Yeah, it’s a bit masochistic perhaps, but I just can’t help myself. I mean, what if it works and it comes out garment-quality? Either way, I’ll learn more.
Happy fall ya’ll- and happy beginning of the season when I can take and tan roadkill.
This will be another “resource” post. I’ve mentioned my tanning dressing in several posts now, and more or less explained it once, but I want to give clear instructions for the recipe here – for reference!
Ingredients:
Handmade natural, plain soap. No essential oils or other additives. I make my own from rendered lard or tallow, sometimes from pure olive oil.
Purified water. If you have hard well water like me, don’t use it.
Neatsfoot oil. Alternatively you could experiment with using other oils, like vegetable or olive, but I like to keep all my tanning fats animal-based in the spirit of using byproducts of meat production.
You’ll also need a large pot for boiling water, a large wooden or nonstick spoon, and a sturdy bucket.
Steps
Put about a gallon of water on to boil.
Meanwhile, grate a bar of soap as finely as you can. My bars are 4-5 ounces.
When the water reaches a boil, add the soap and remove the pot from the heat right away
Stir gently; try not to create much lather
After all the soap has dissolved and the solution is cooled but still hot, pour it into the bucket
Add about a cup of neatsfoot oil and stir
You’ll need to stir until you have a homogenous solution
Let cool, and you’re ready to tan with it
Water and oil don’t usually mix, but the soap acts as an emollient, allowing them to form a solution.
This tanning mixture is similar to a brain tanning mix – it has water, fats, proteins, and emollient.
My muscles ache, I have new cuts on my hands, and my hair smells of woodsmoke.
I smoked the white and creamy skins, and the shearling hide today. I had forgotten how challenging it can be to get the right type of fire going for a good smoke. You want material that will give off lots of smoke and smolder rather than flame – like wet leaves, green branches, tree bark, or rotten hardwood. I used wet leaves and some old, punky silver maple from a stump that I gave up trying to split about 5 years ago because it was so twisty and knotted. Once I remembered not to add too much dry, very flammable material at once, things went pretty smoothly.
Smoking sheepskins
You’ll notice that my smoking set-up is very primitive. I haven’t mastered using a jacket and sewing the hide into a tube. I’m still doing this, years in to this craft.
I exposed them to smoke for about an hour.
Then I got to work on cleaning the fleeces up the rest of the way. Both bigger hides still had dingleberries. All three had wool tips that were just plain dirty, and the shearling had old blood around the nape.
I didn’t want to unnecessarily wet the leather, so I decided to use a spray bottle with water and a bit of free and clear detergent. I sprayed this liberally into all the problem areas and then used my hands and a pet slicker brush to get out as much debris as I could. The blood stain, long ago turned purple, on the shearling was the worst of it, and I’m not convinced I’ll ever get it out. To finish up the washing I used a watering can to rinse the fleeces with plain water.
What’s left of dirt clods and dingleberries I believe I can liberate with my wool hand cards that are arriving this week.
I hung the skins to dry in what’s becoming my new workshop (half my garage). Not much left to do but either list them for sale or decide to keep them.