It lost a bit of hair to slip, but it’s mainly undercoat and not visible from the front unless you’re looking closely in the right place.
I gave it a brushing today so I could assess the “damage”, but really, it’s going to be just fine.
So there’s my reminder that alum is it!
I’ll be tawing my other 2 deer skins after I get this one and the sheep smoked.
After that, I may put my little tannery to rest for the winter. These very cold months aren’t the best for tanning, and this issue with the deer reminded me of that. This work is seasonal and I need to respect that. Especially without having my woodstove hooked up in the workshop.
I have a small (grateful it’s getting smaller) inventory of tanned skins for sale, and I’ll pick up with my 2 deer, and the last 2 sheep from ’19 when the weather starts breaking in (let’s face it) April.
Even with the excess shedding, this hide is so pretty.
A few things have happened with my skins since last writing. Remember when I said the weather was giving me a respite? I woke up the next morning to the sound of rain; the skins were drenched! I lugged them inside to the front room of my house (slowly becoming a makeshift tannery?), covered the floor under them in newspapers, and crossed my fingers that they’d start to dry.
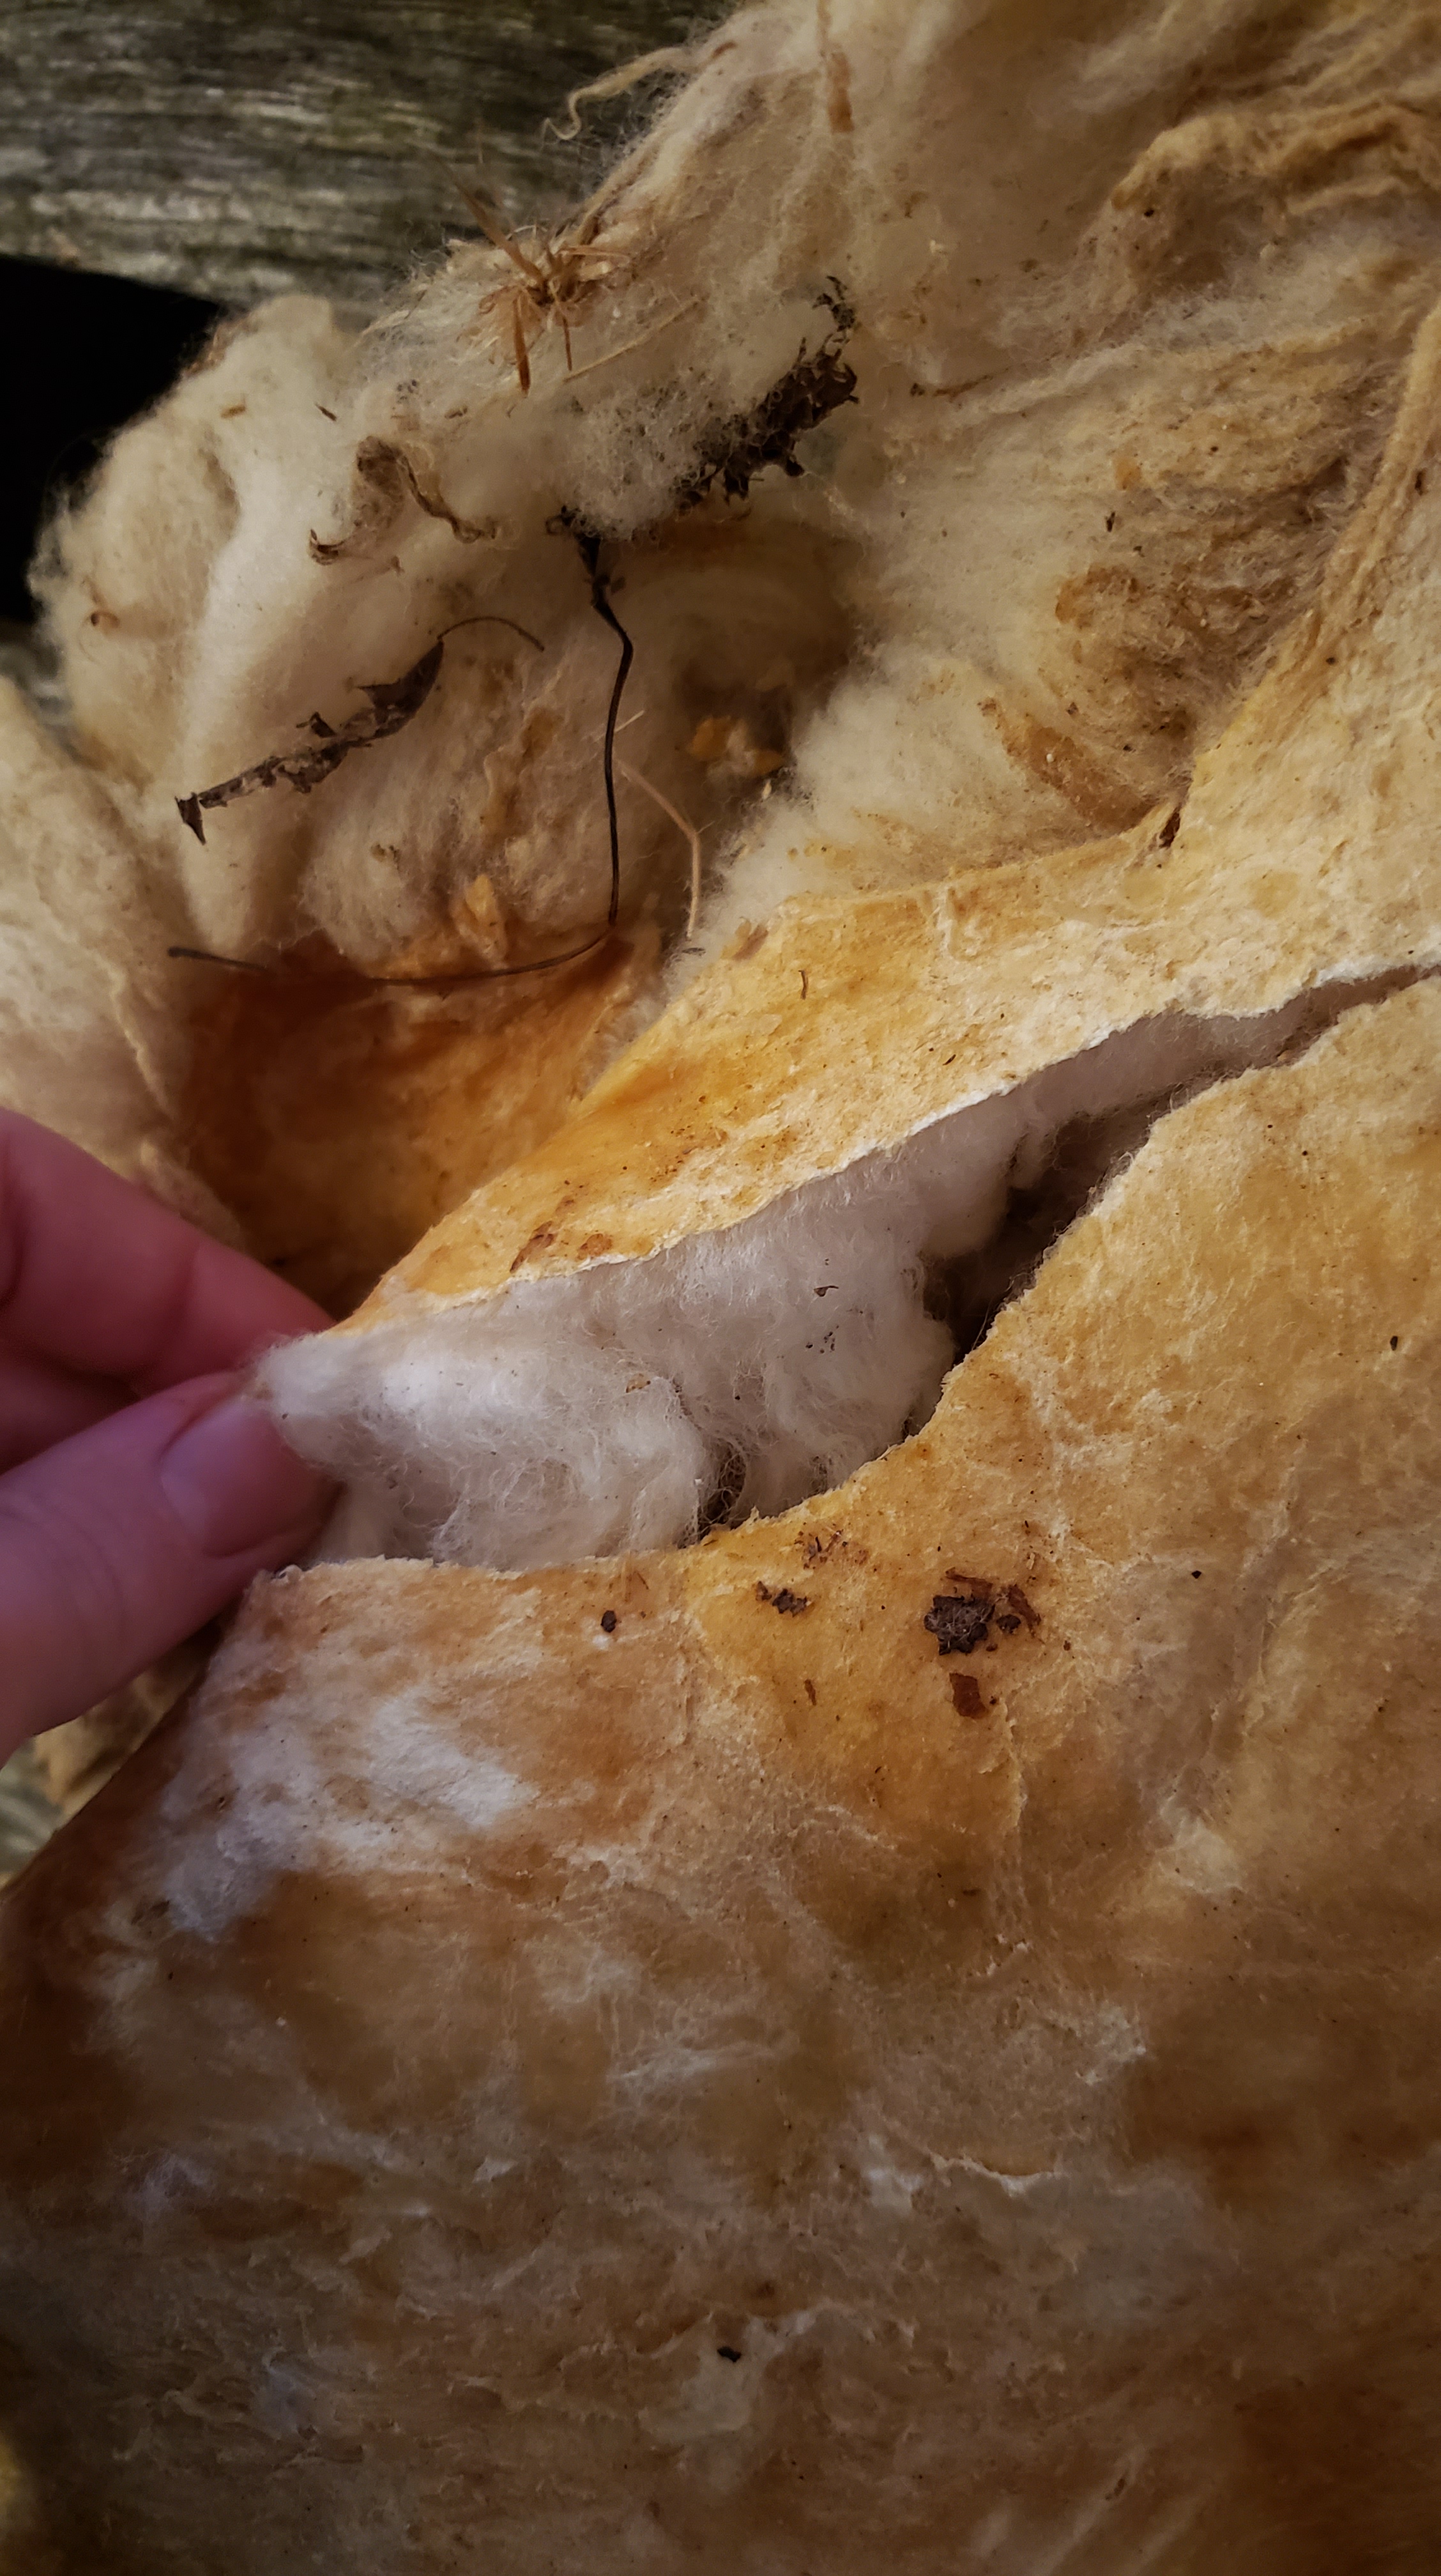
The real problem was that I was starting to notice that the large hide i had rehydrated and jokingly called “crispy” was just not looking right. The leather was very brown in places, and continued to look dry and brittle despite the fact i had reapplied the tanning dressing. I started to try to hand stretch the leather, and as i got towards the edges of the pelt, the leather just ripped. It was still weak and brittle.
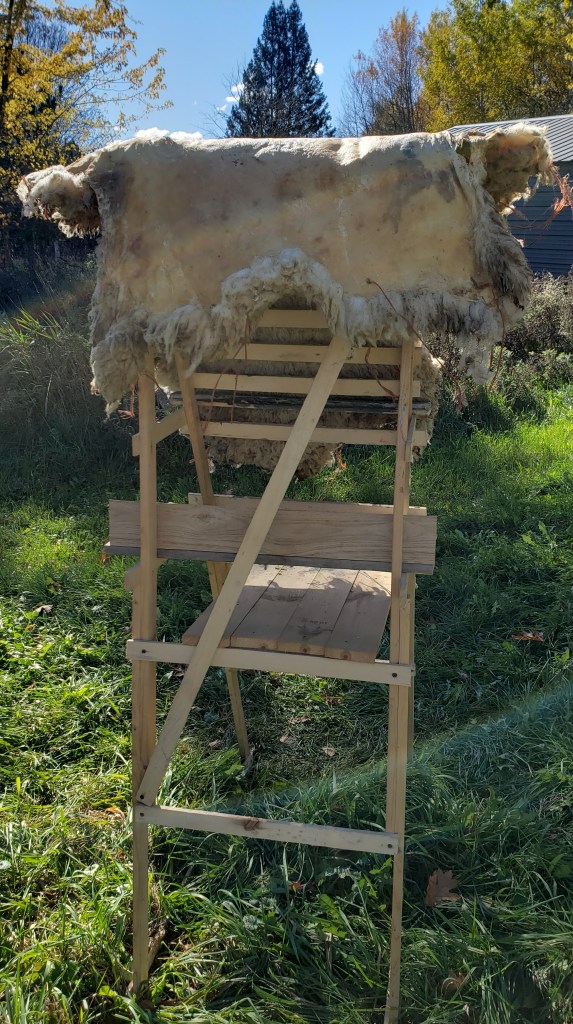
I decided to get both the skins on some kind of frame for stretching. I pieced together a couple things from an old pallet and scraps of plywood from a flooring project.
The big creamy one
This morning I rubbed neatsfoot oil into the hide with the brittle bits and tried again to work it. Starting from the middle, I used the blunt wooden handle of my scraping tool to press in and drag across the leather. The center of the hide looks great and acted just as i expect my leather to. But again, the closer to the edges I got, the weaker the leather became, and it tore in a couple more places.
Here’s what I’ve figured out went wrong here:
Back in ’19 when I started this hide, i dressed it and put it on my stretching frame. I then got taken away from my projects by other things in my life, and this hide hung on the frame for a while without being broken or worked on. I also remember that it was in the sun for a good portion of the afternoons.
I’m pretty certain that the sun damaged and weakened the leather in its infant stages. I determined that those portions of the hide can’t reach the quality I strive for and needed to be cut away.
You can see all the little holes in the above photos. And look at the beautiful, long, crimpy wool! What a shame!
I will never, ever leave the leather side of a hide directly exposed to sun for an extended period of time again.
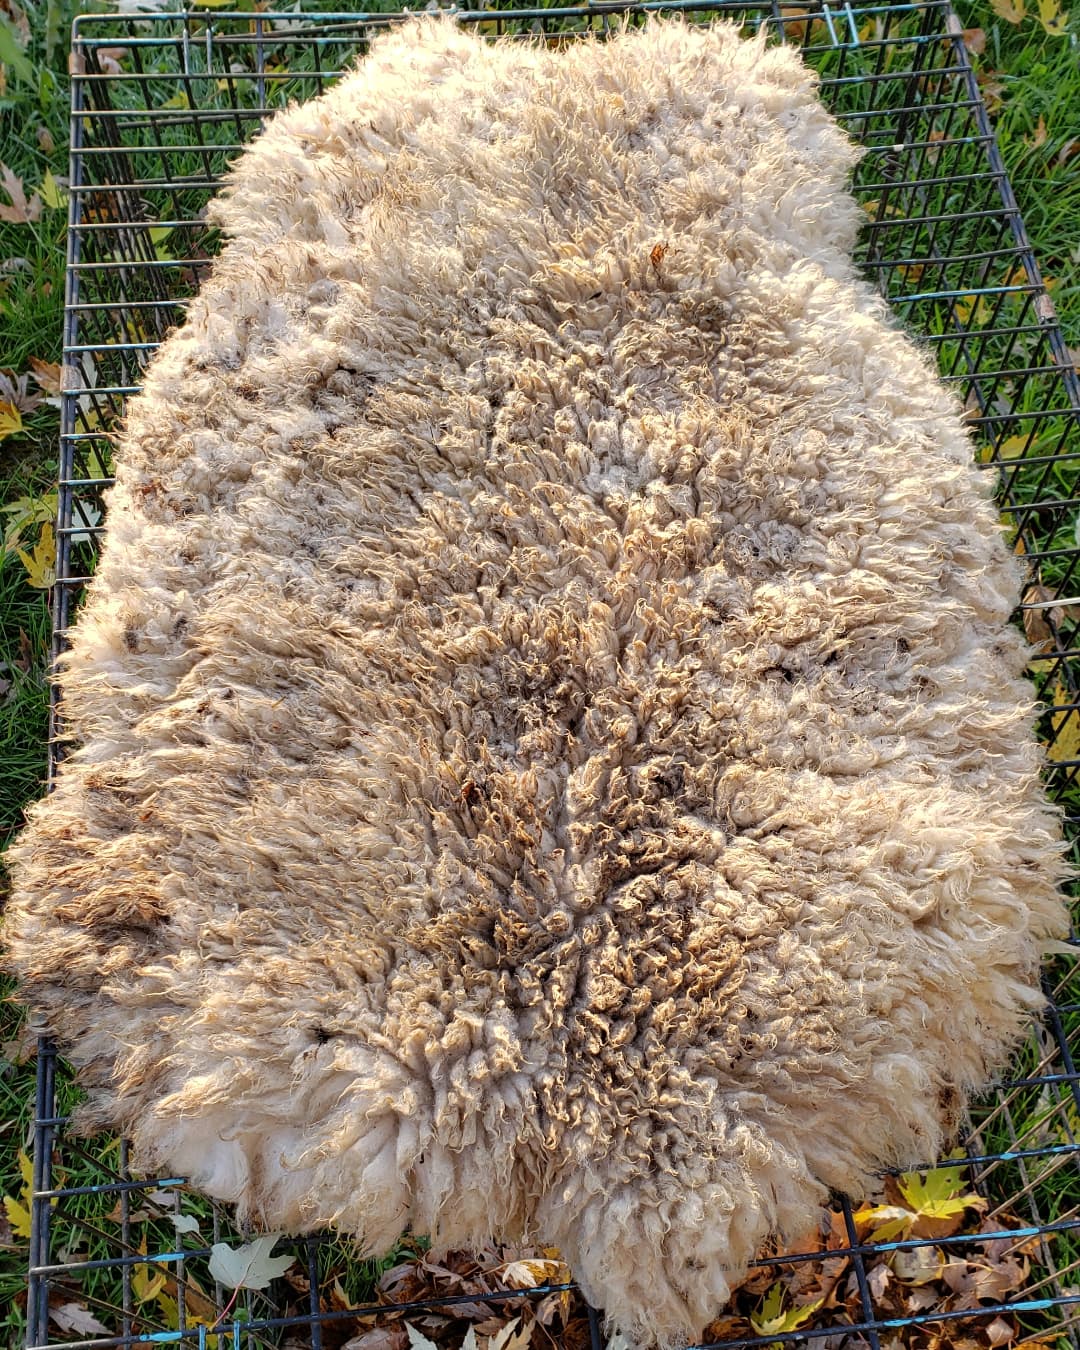
The good in this (besides all I’ve learned and additional experience) is that a significant portion of the pelt is just fine. It makes a cute little thing!
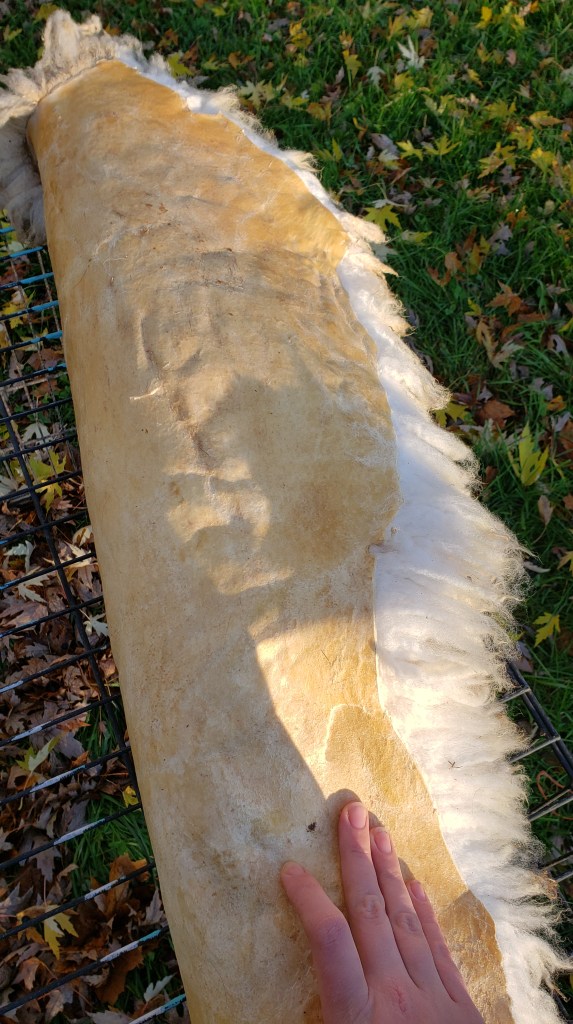
Here’s the good leather that’s left.
Here’s the before and after trimming.
The other hide, big and creamy, is coming along just fine. I still have her drying in the house, and would like her a bit drier before smoking.
The first shearling is done and will be smoked with the other two before I move on to the next skin.
Ew. I really didn’t want to have to do this, but I’ve got to start getting these hides clean and I’m racing against the change of seasons. It’s already well below freezing at night now, so I can’t soak them outside. And soon, it won’t get above freezing during the day, so I’ll have nowhere to dry them.
The sheepskin in my bathtub is the one I coated with my tanning dressing last night – the crispy, brittle one. I reapplied it during the day today (sorry I didn’t get to take pictures; I have to steal moments for this kind of stuff because I have a 4-month-old).
The dressing didn’t save the hide. Not all of it, anyway. The edges are too brittle in places, and even with rehydration and using a blunt tool, I tore right through in a few spots while trying to break it. I think I’ll have to lose the right hind leg, both side pieces, and most of the nape, plus all edges. It’s a shame – I took off the legs and shaped this hide pretty perfectly.
This is what happens if you tan a skin but don’t break it. You can’t just slap brains or soap mixture or eggs (or store bought, commercial tanning bullshit) on a skin and call it tanned. You have to force the skin into being leather. It takes work.
So, in light of this setback, and the weather closing in on me, the plan now is to wash and dry each skin, and get a coat of soap & oil on them before they dry. I’ll have to work quickly and do a little each day.
Washing them in my bathtub isn’t ideal, but at least I can still dry them outside.
Not my favorite day of tanning. It’s disappointing when the tan doesn’t go right, especially, for me anyway, when the skin becomes brittle and you can’t do anything with it but rip it. But, for everything that doesn’t go right I learn more. I try to remember that I have the luxury of modernity and can afford to make mistakes with resources like this. Our ancestors couldn’t.
I’ve mentioned “tawing” and “alum” here a few times, and it occurred to me that it might be helpful if I explain what the hell I’m talking about.
Alum is a naturally occurring mineral, a salt of aluminum. Specifically, it’s aluminum sulfate. Alum is not chrome or chromium! A Google search will tell you that alum is used for pickling and food preservation, as well as making leather. Historically it was also used to leaven bread.
When alum is used for leather-making, the process is called tawing. This is mineral tanning, which is one of the most ancient forms of tanning. Purists will probably argue that it’s “not really tanning” – I don’t totally disagree, but would point out that’s why the process has a different name.
I was taught about using alum on fur-on animal skins by the leather-maker at Colonial Williamsburg, who was a friend of my husband, in 2010.
I’ve heard it said that tawing produces stiff, hard leather. This is only true if you don’t work and stretch the hide as it dries, which is true of tanning with soap, bark, oil, egg, or brain as well!
When I do large hides (sheep, goat, or deer vs. rabbit or raccoon) I first taw the skin in alum and salt. Then after rinsing with clean water, I apply my soap and oil solution to the wet skin to tan it. I realize this sounds like overkill or a double process, but once I started tawing before tanning I never had the dreaded hair, fur, or wool slippage again!
For small pelts I’ll often just taw them by soaking in a strong pickling solution of alum and salt, and then hand-stretching as they dry. It’s so easy to do lots of small skins this way, and the leather can be further softened and darkened with neatsfoot oil.